
Posted on January 19, 2020
DIY Arcade Cabinet
Finally a big dream of mine has come true. I built my own retro arcade cabinet!
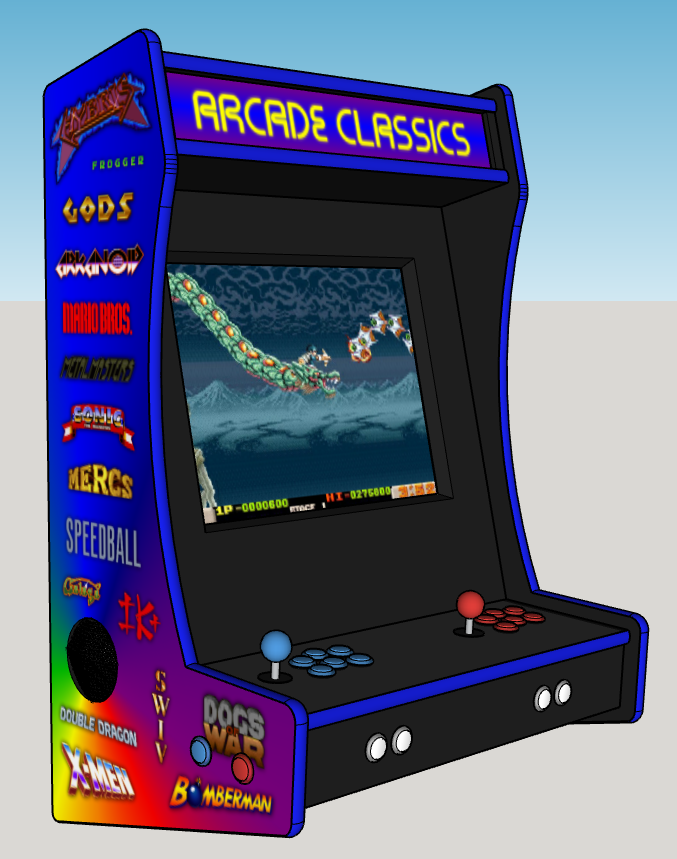
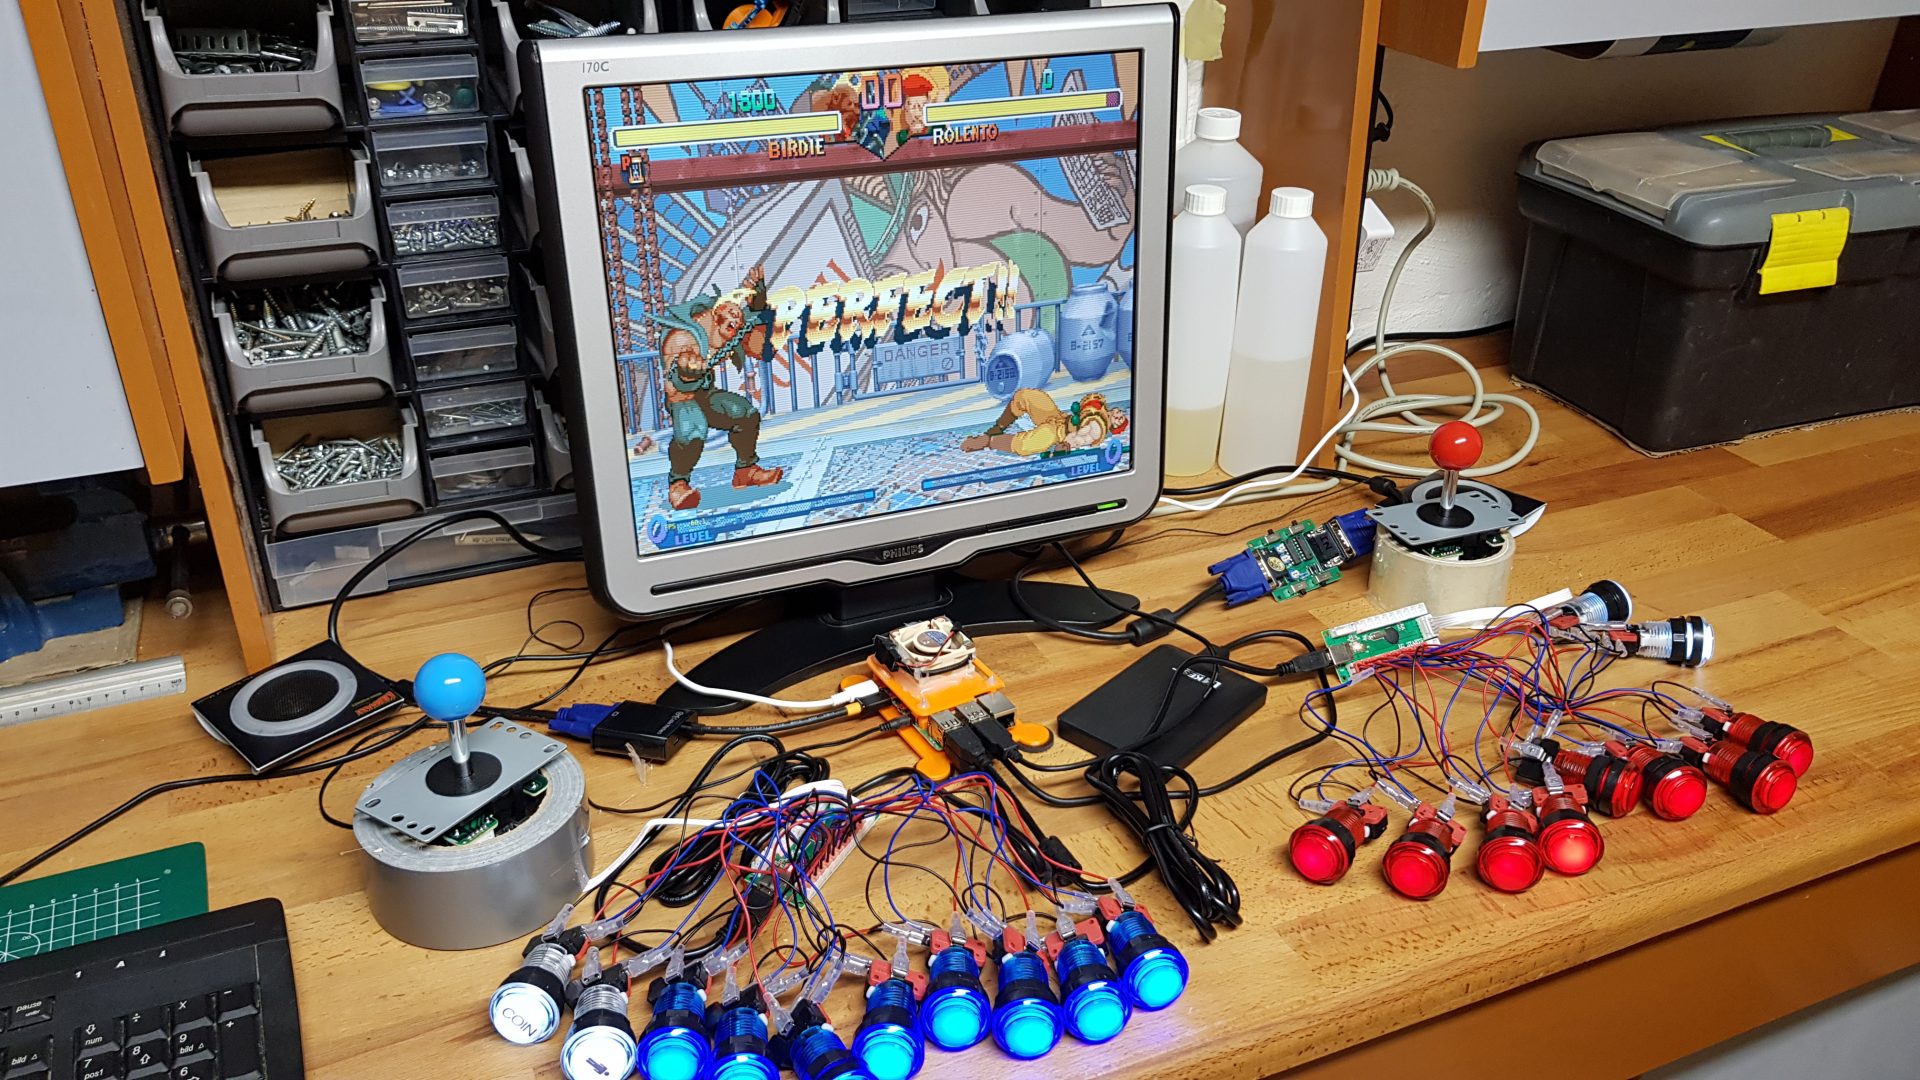
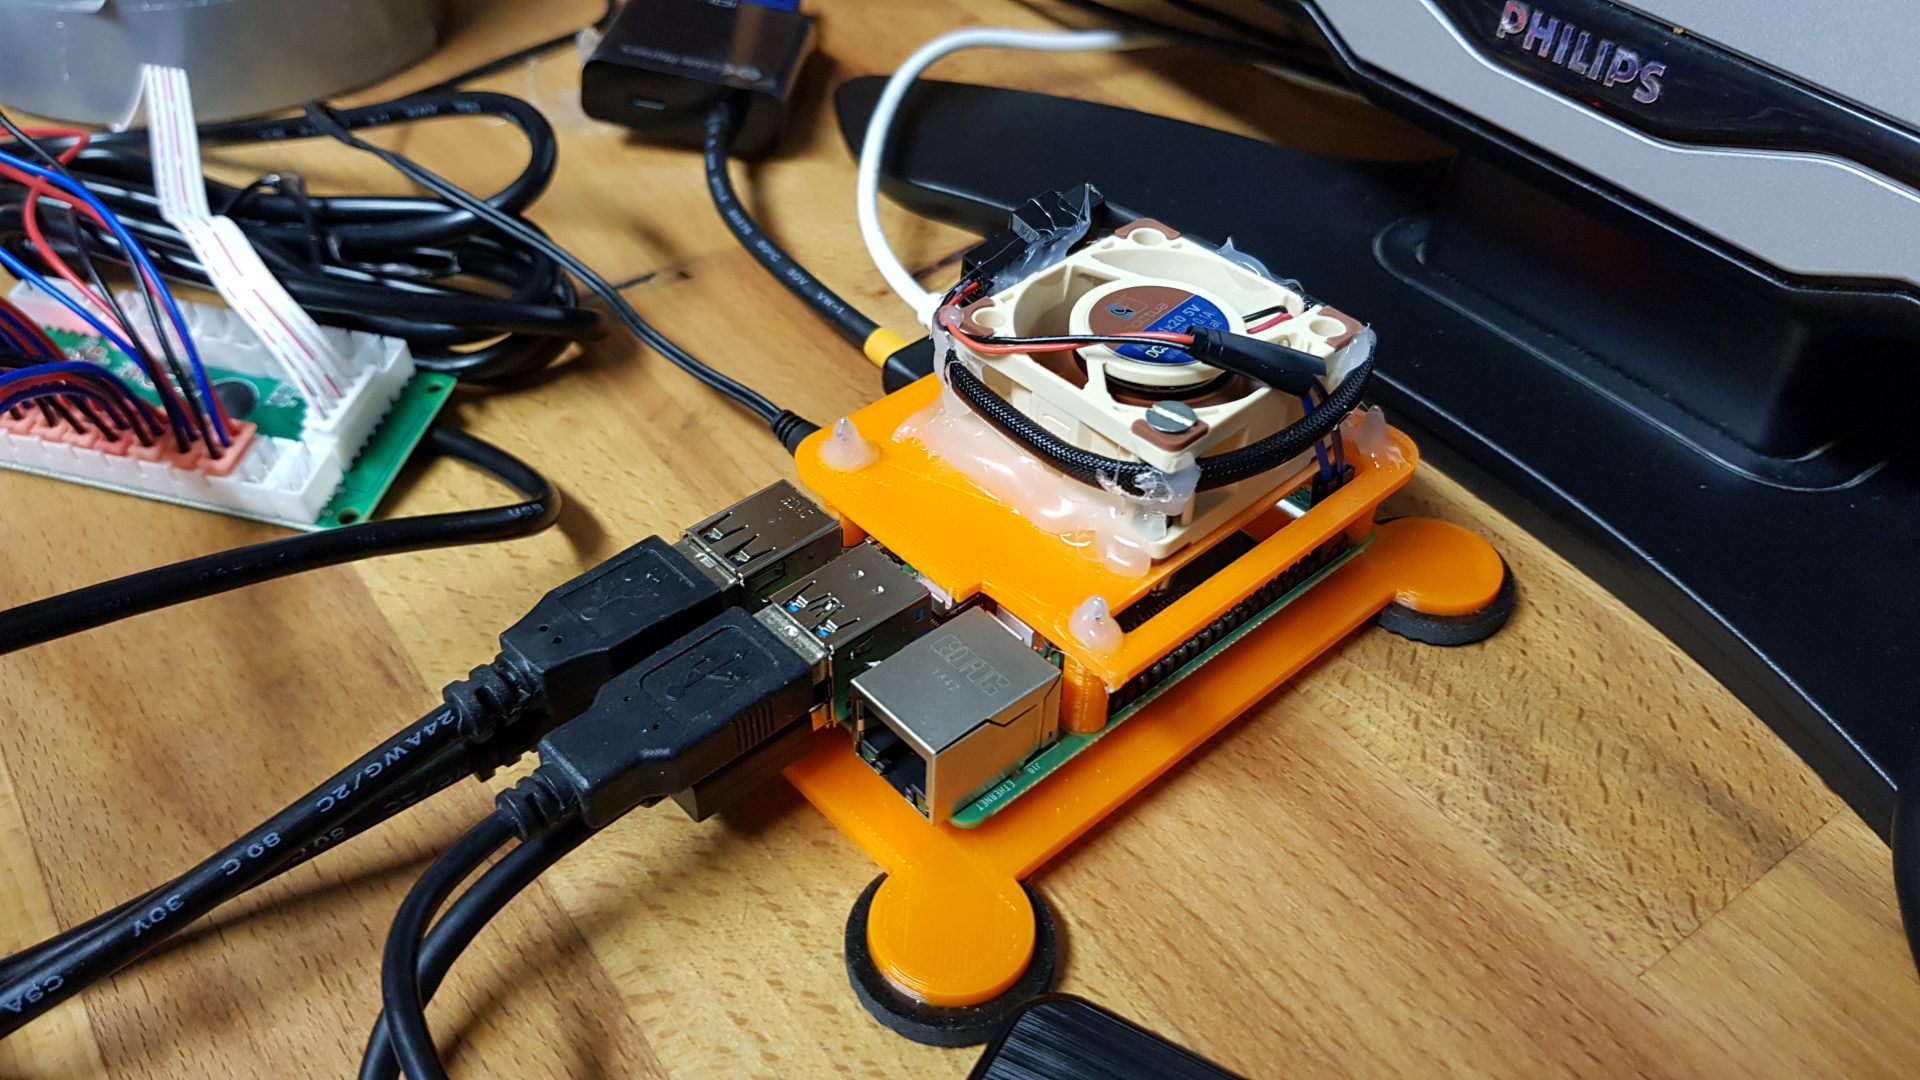
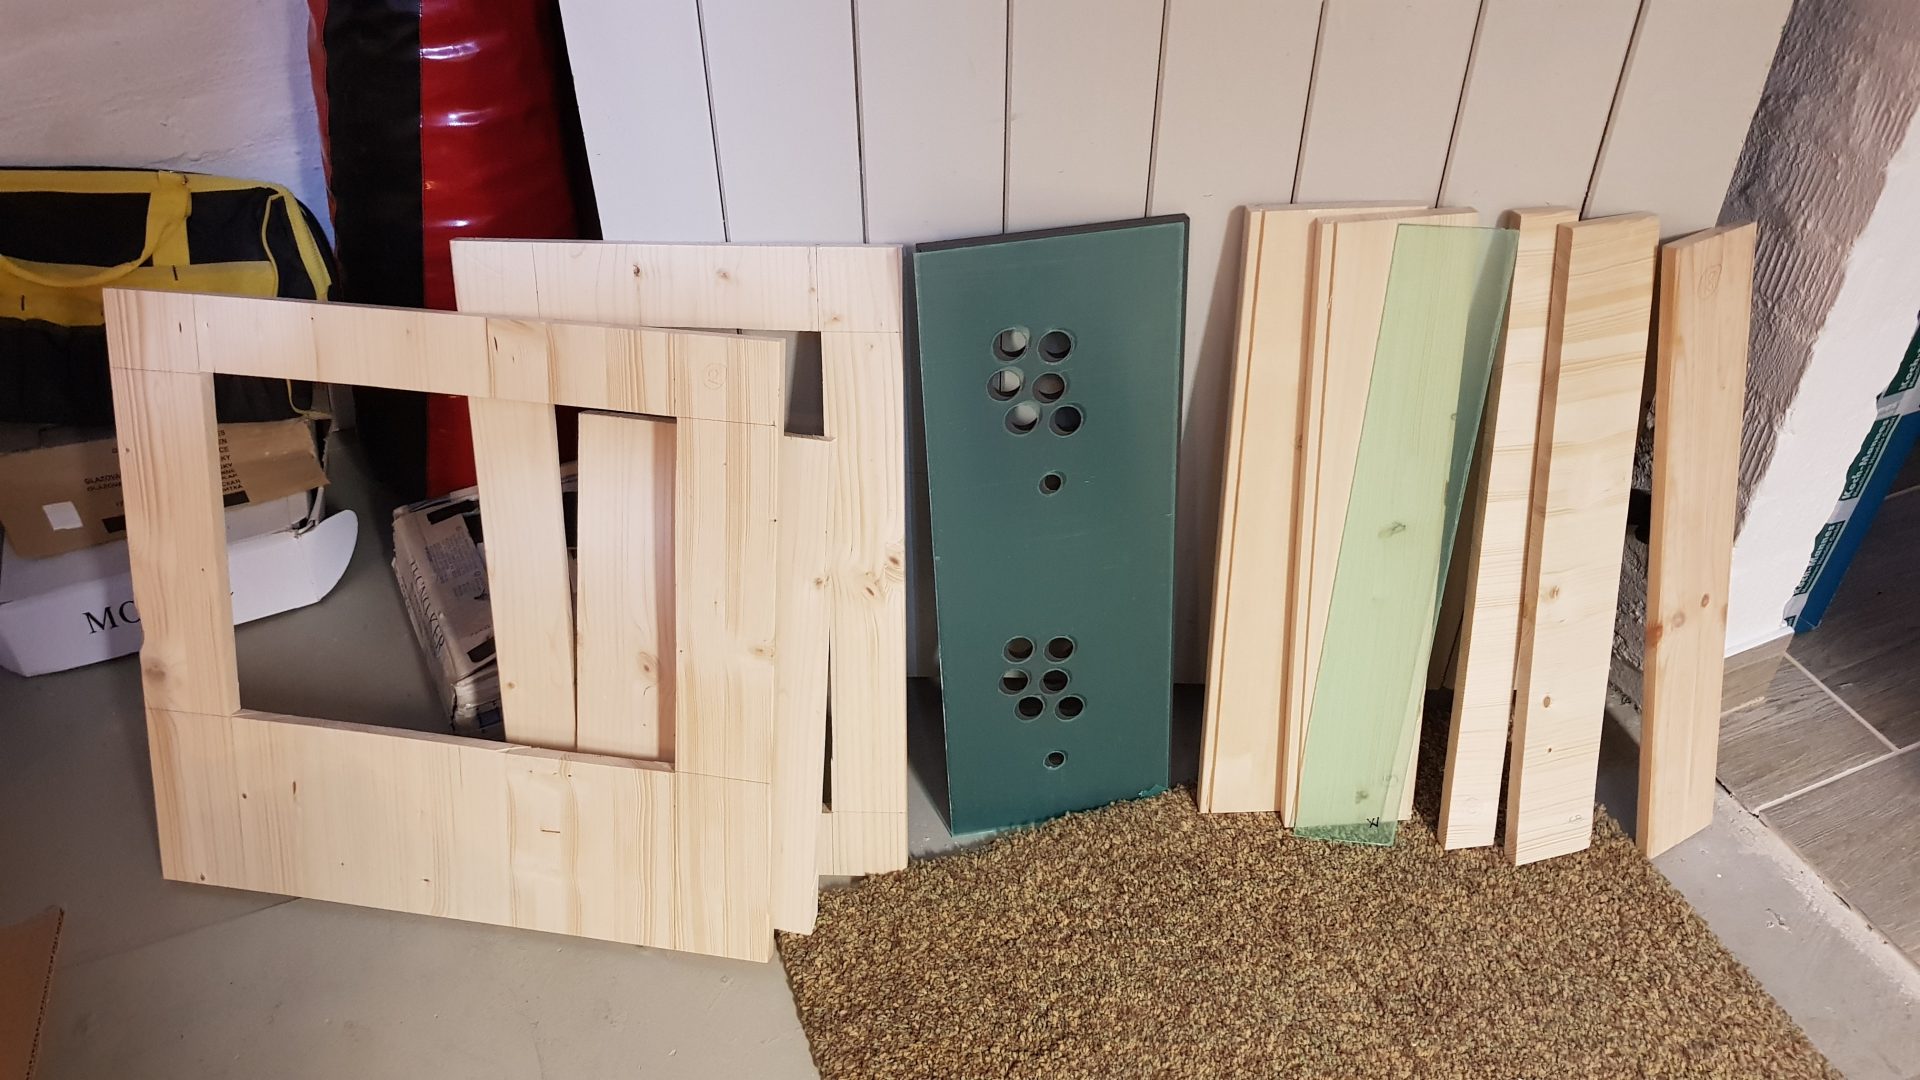
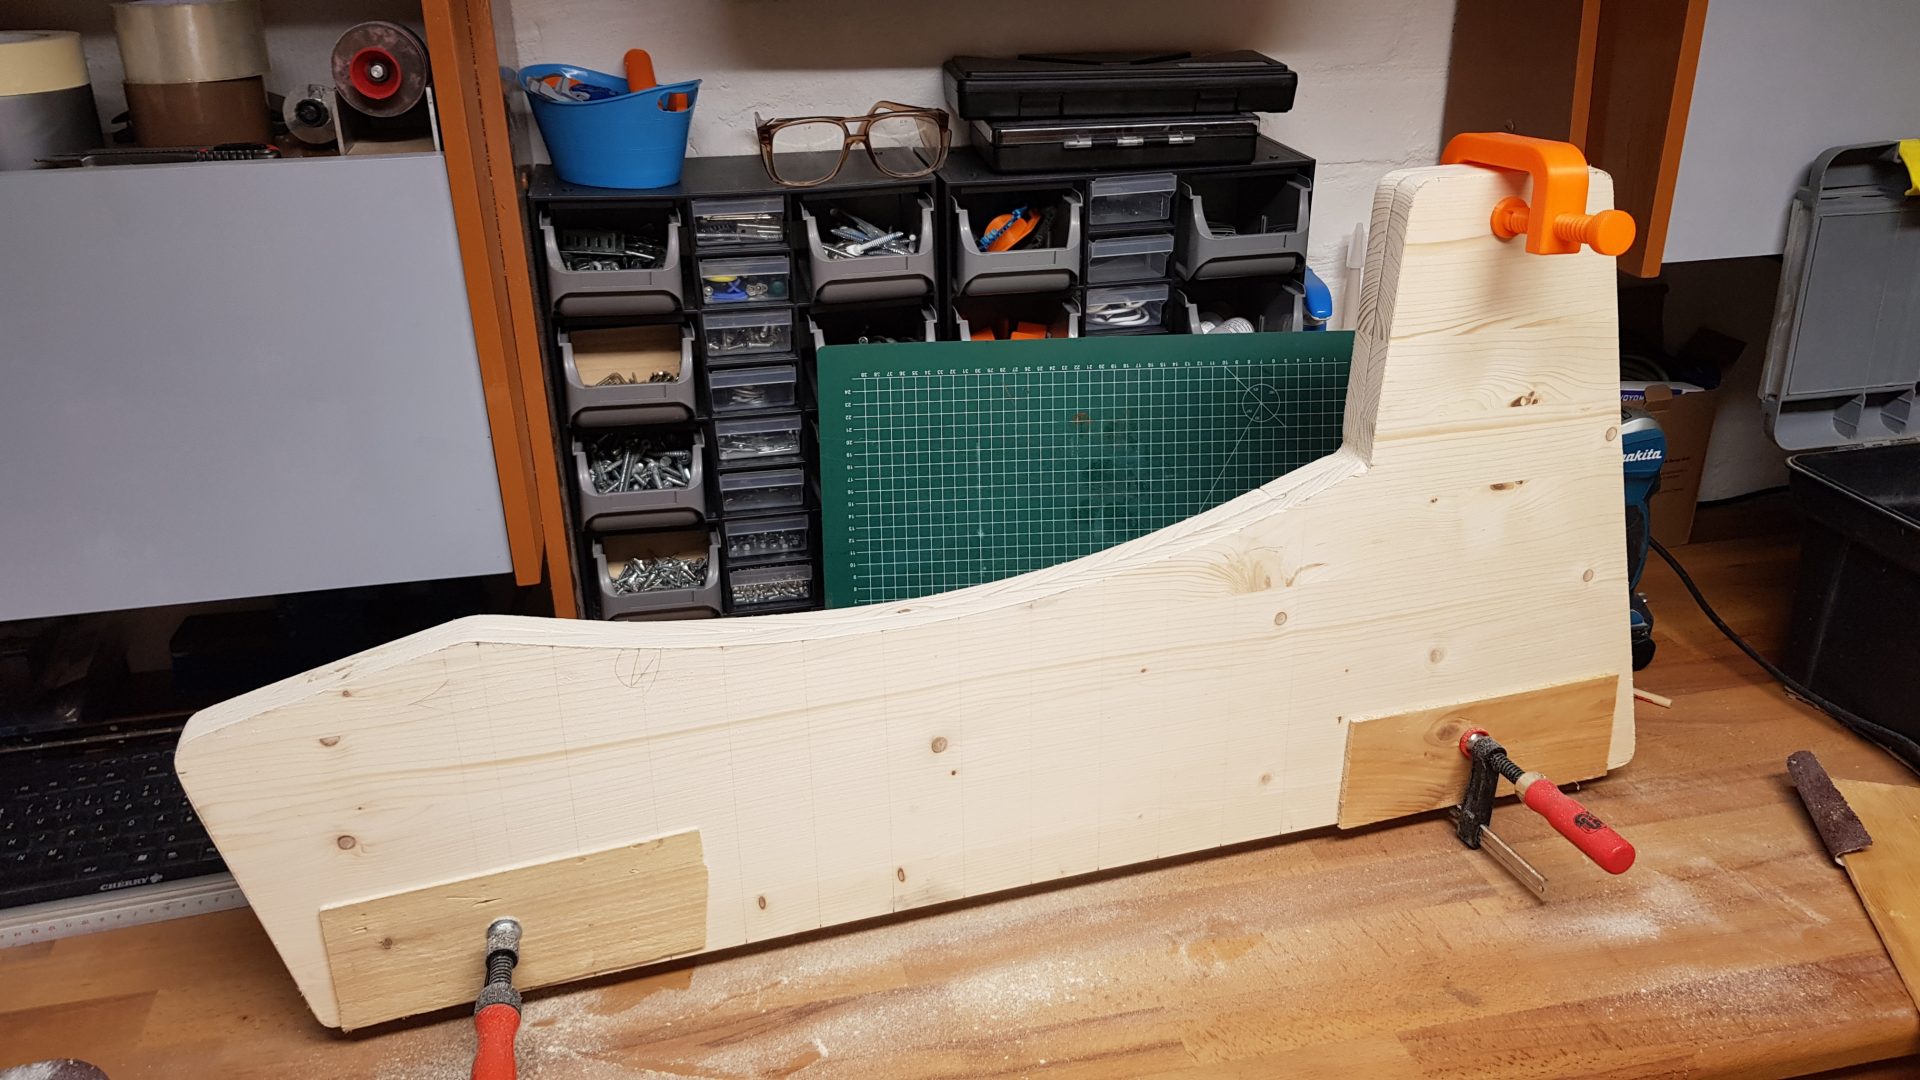

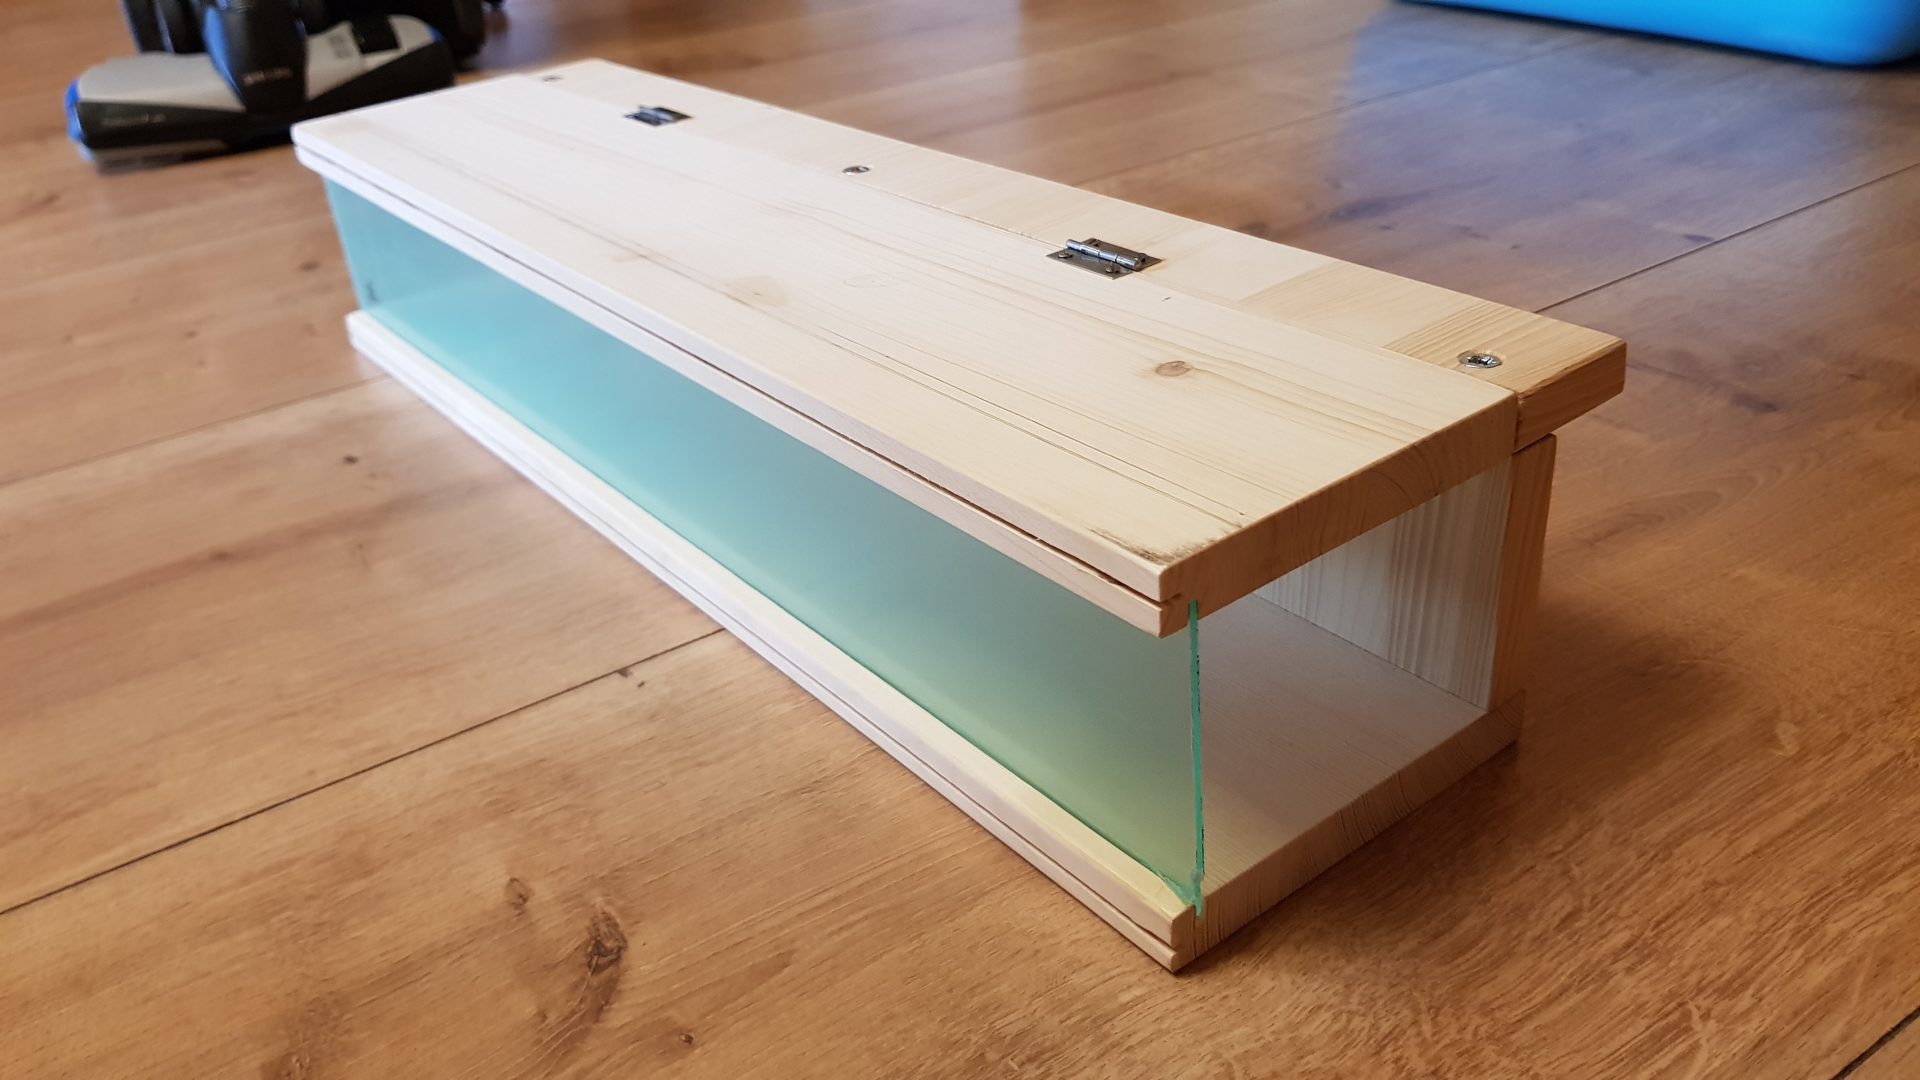
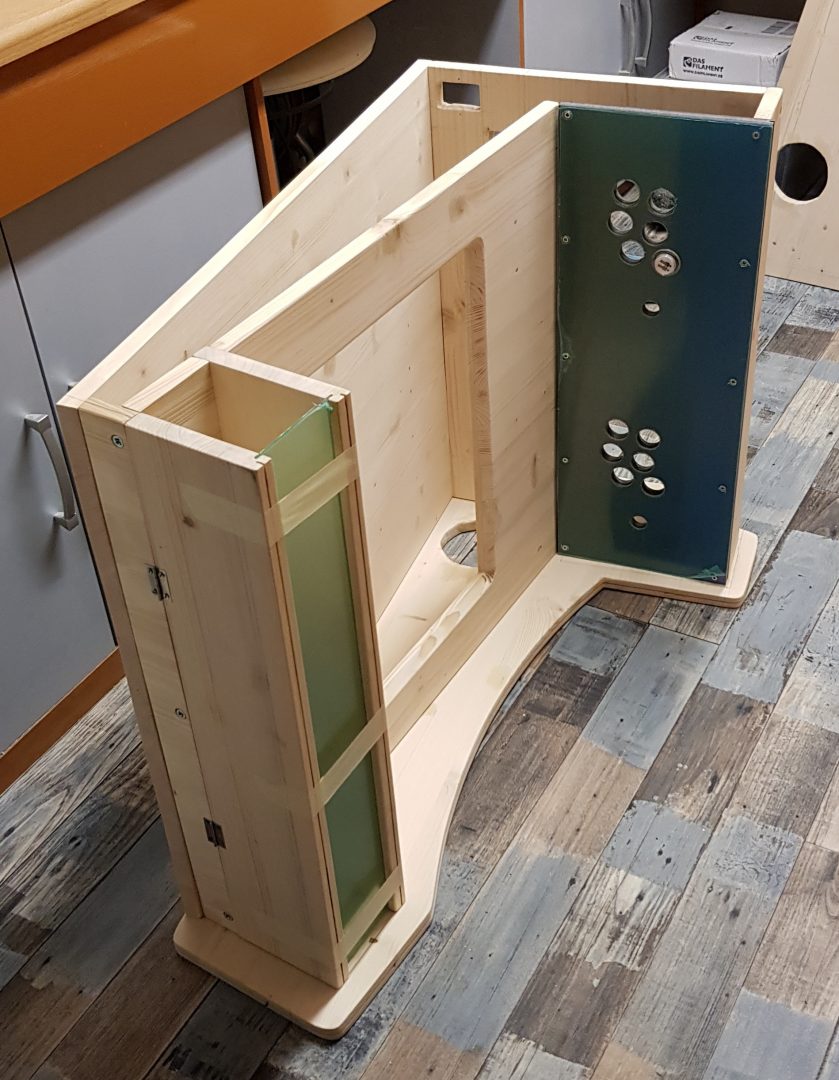
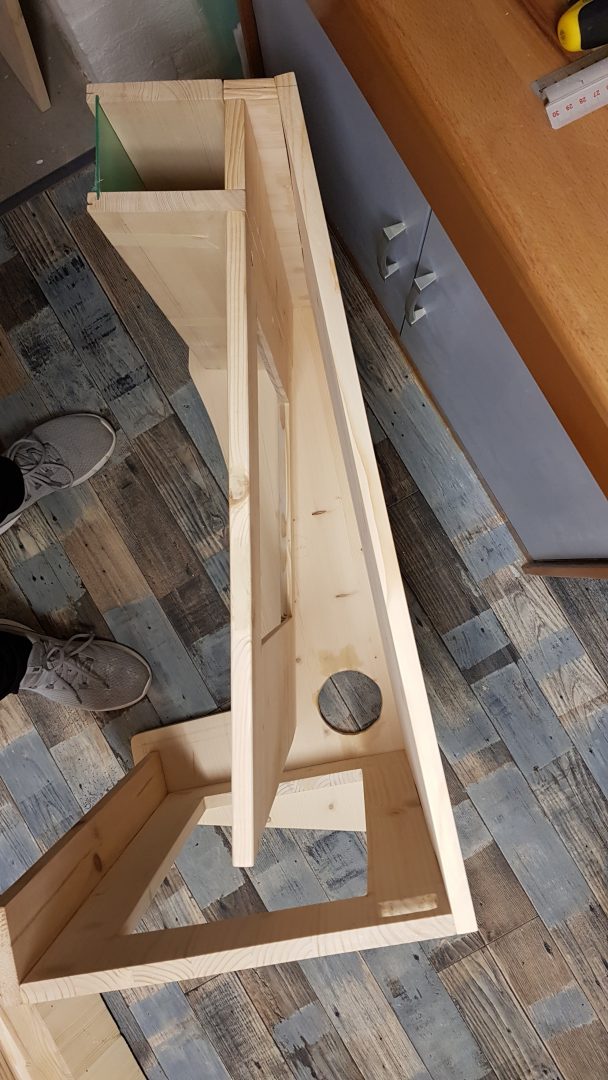
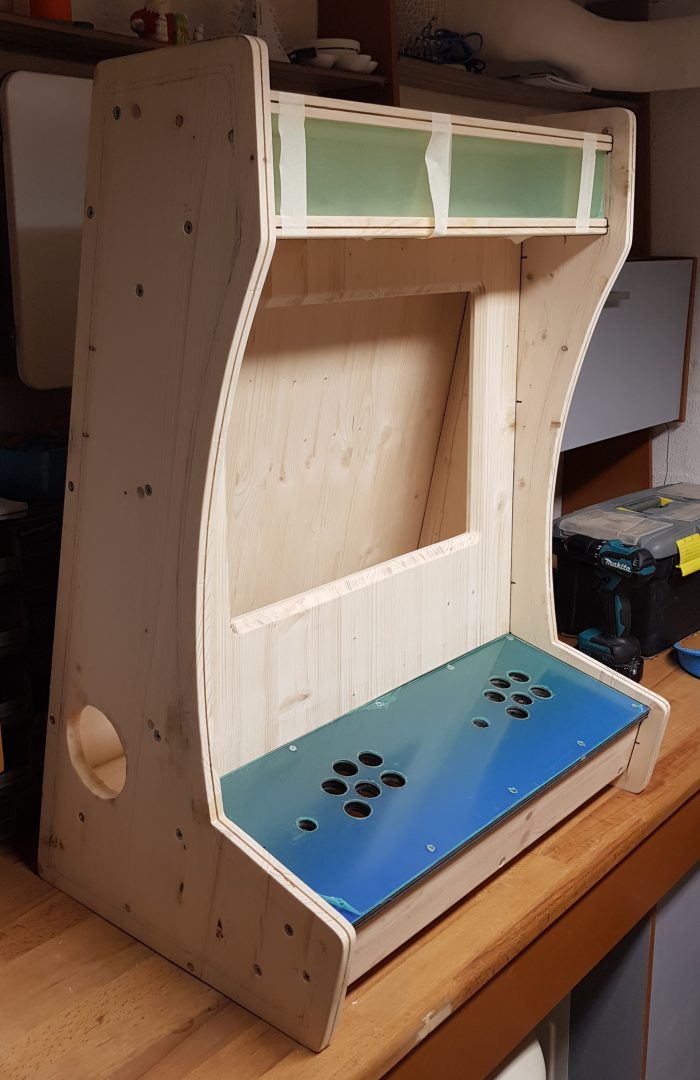
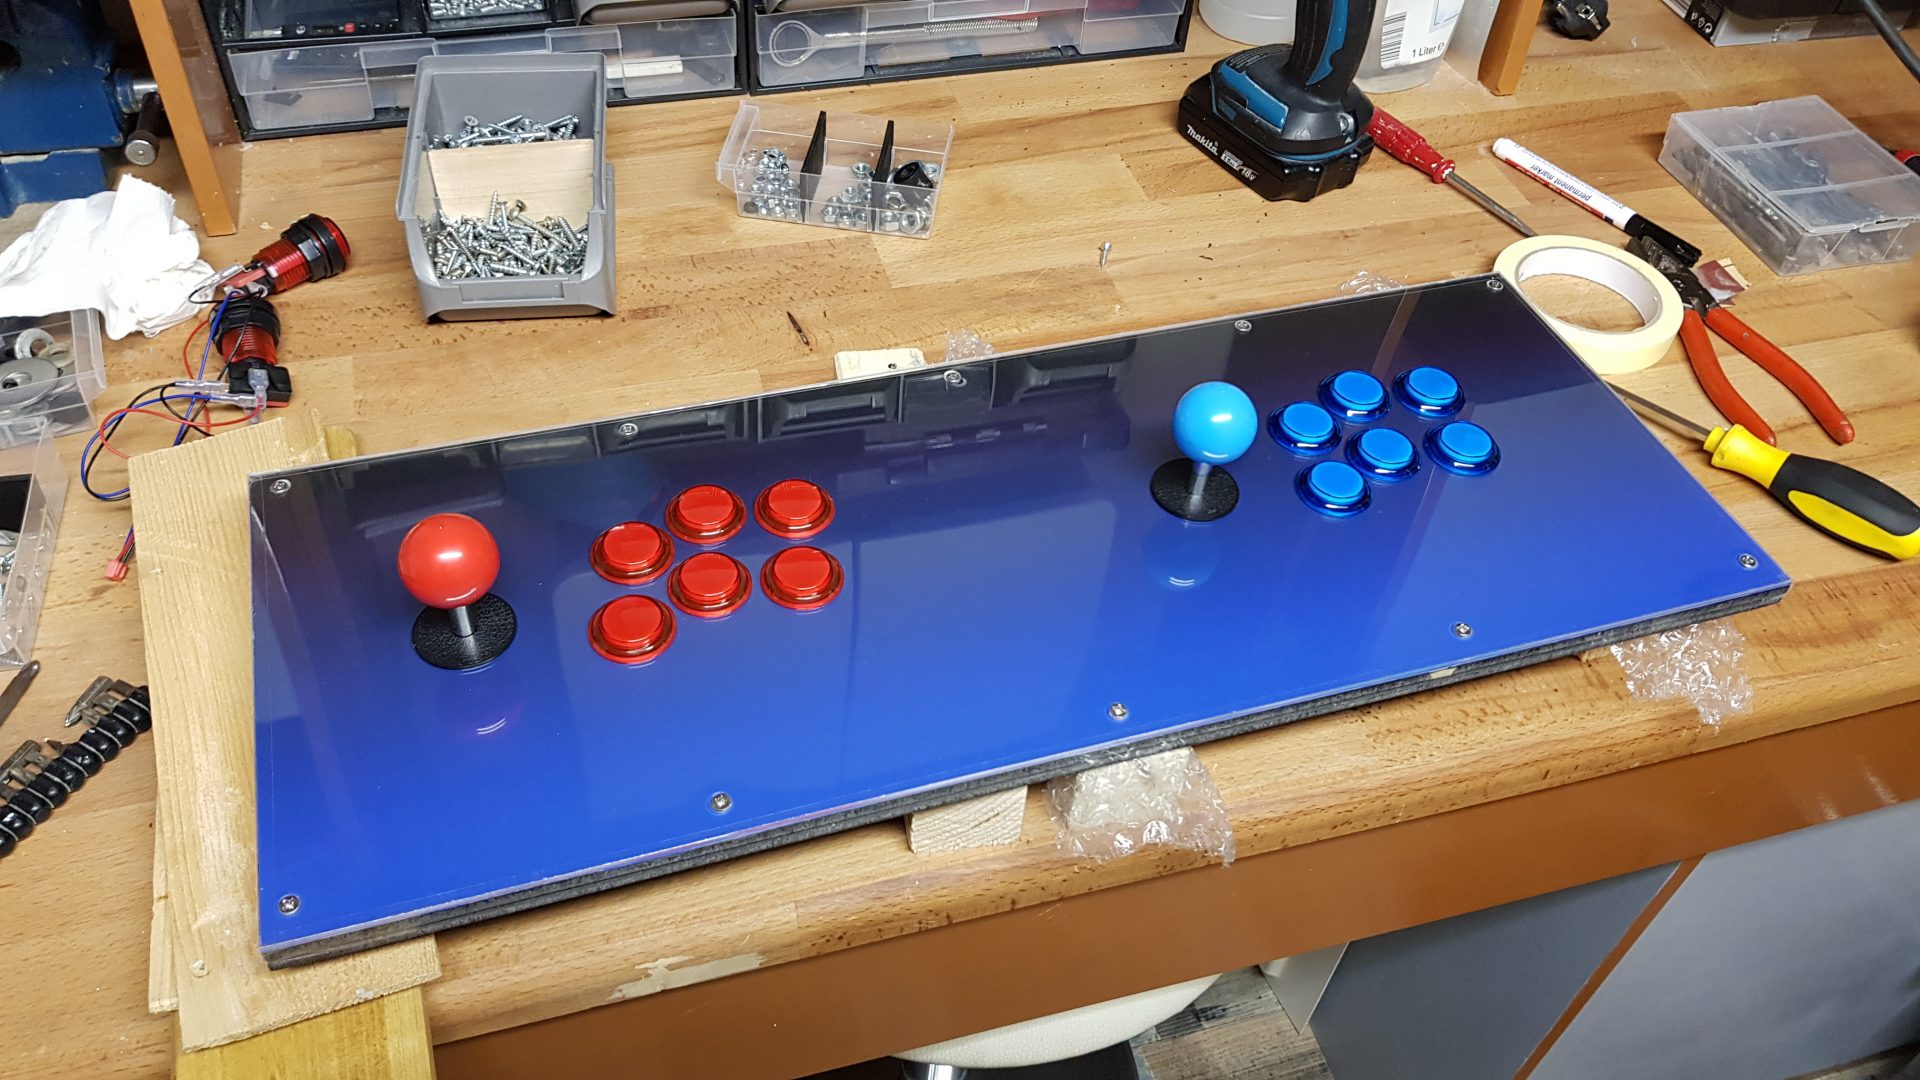
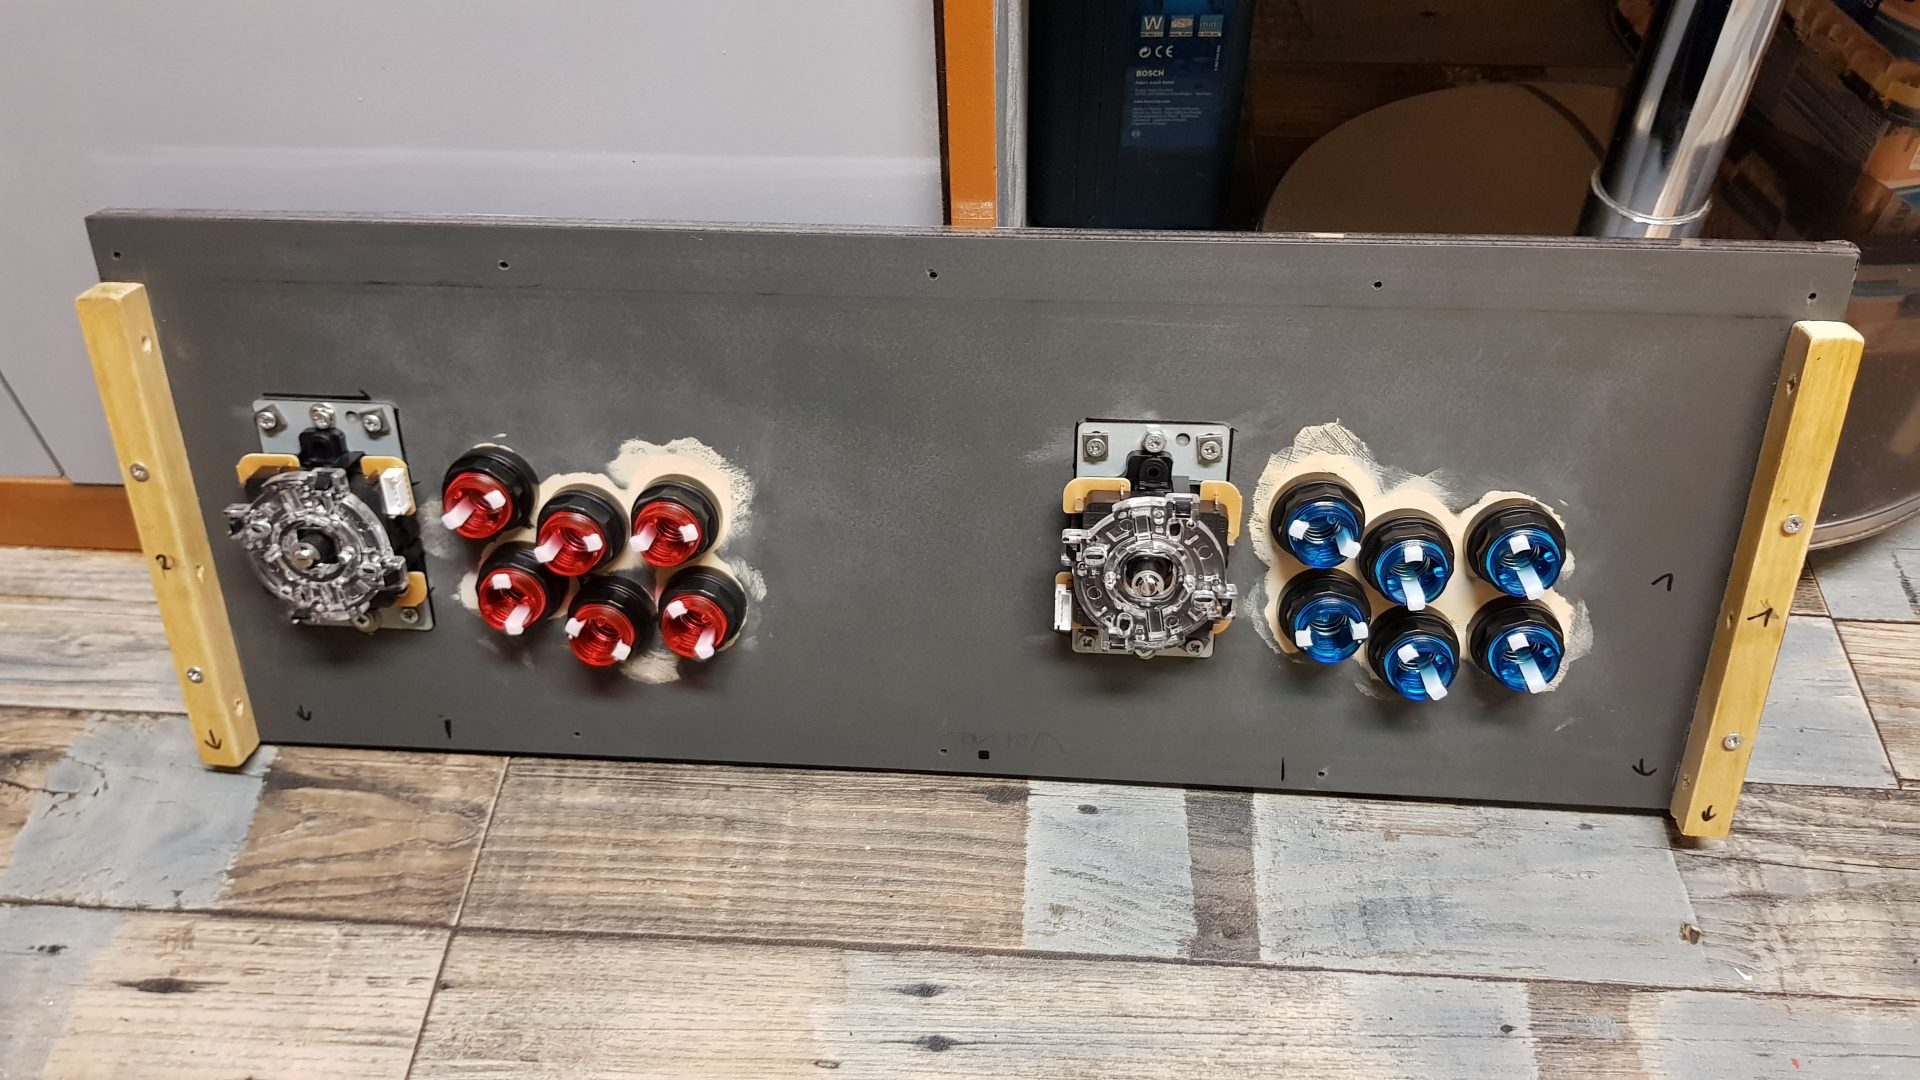
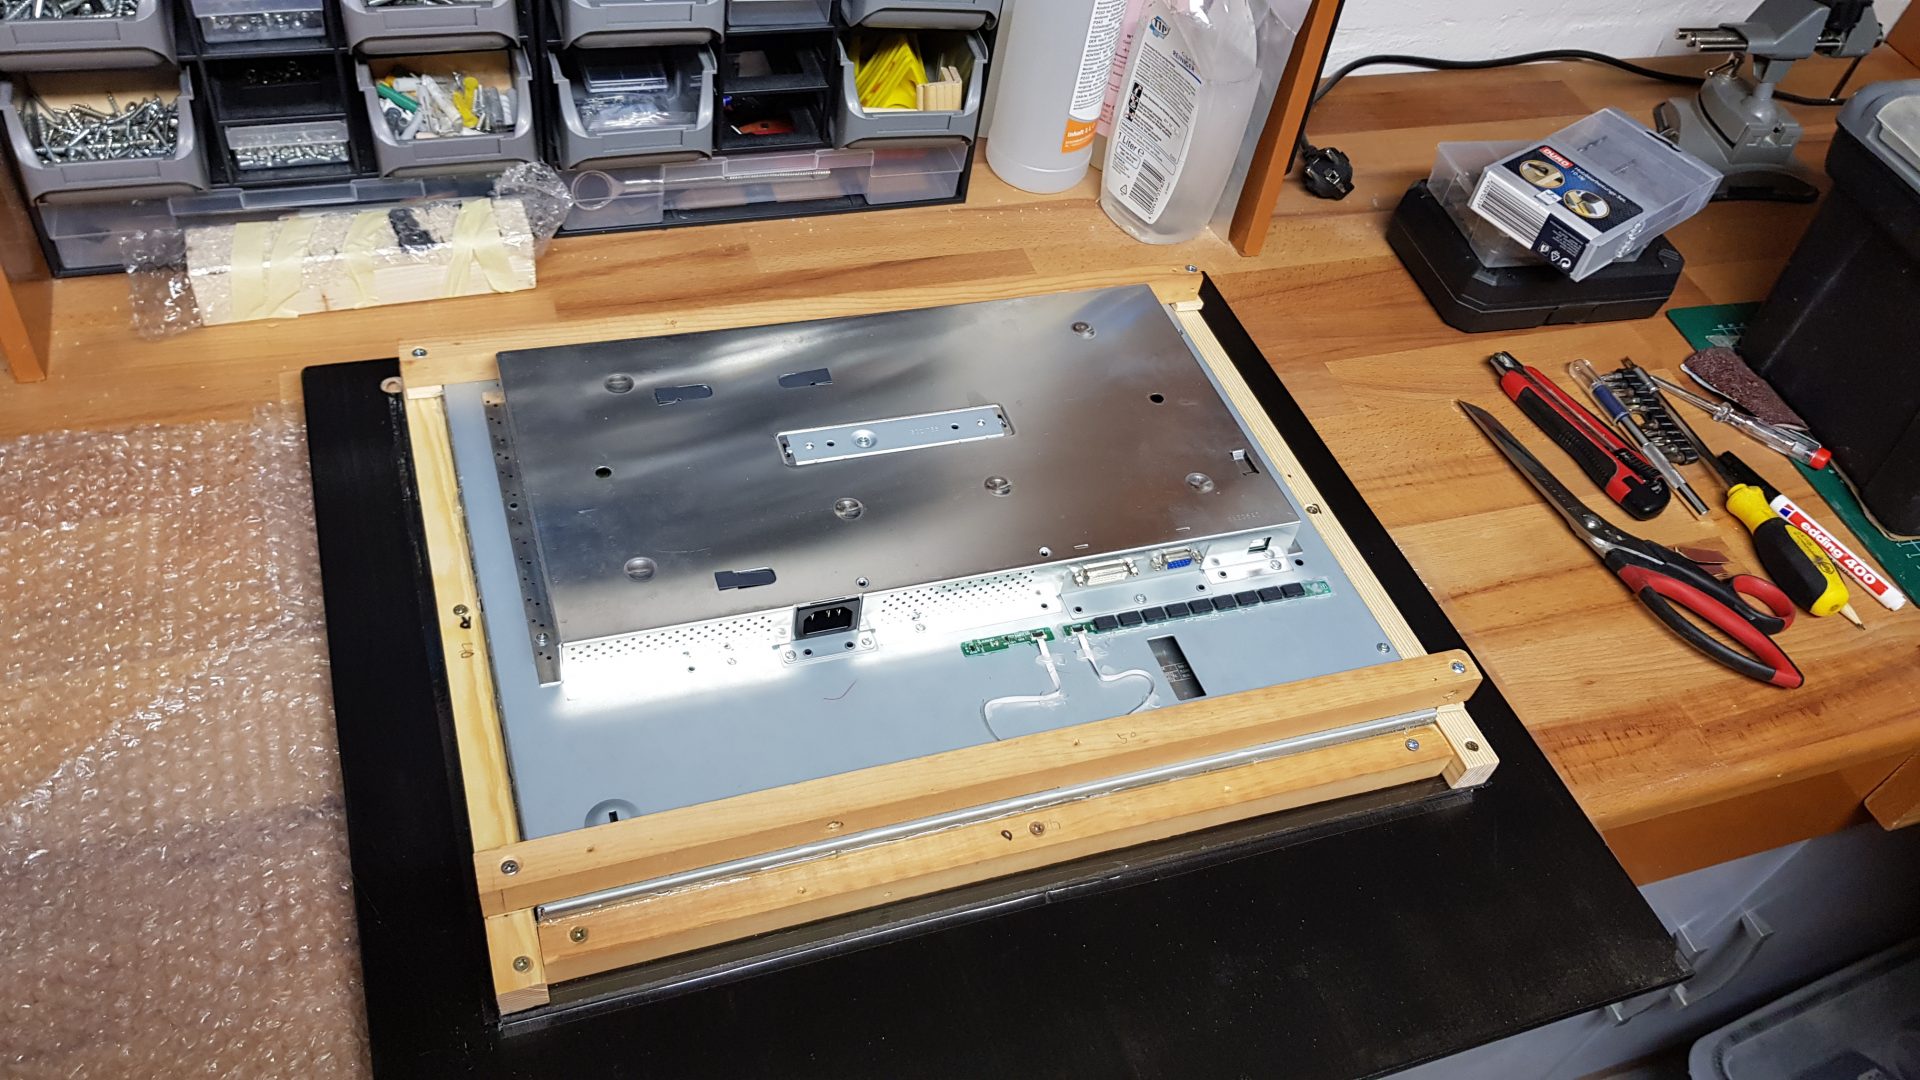

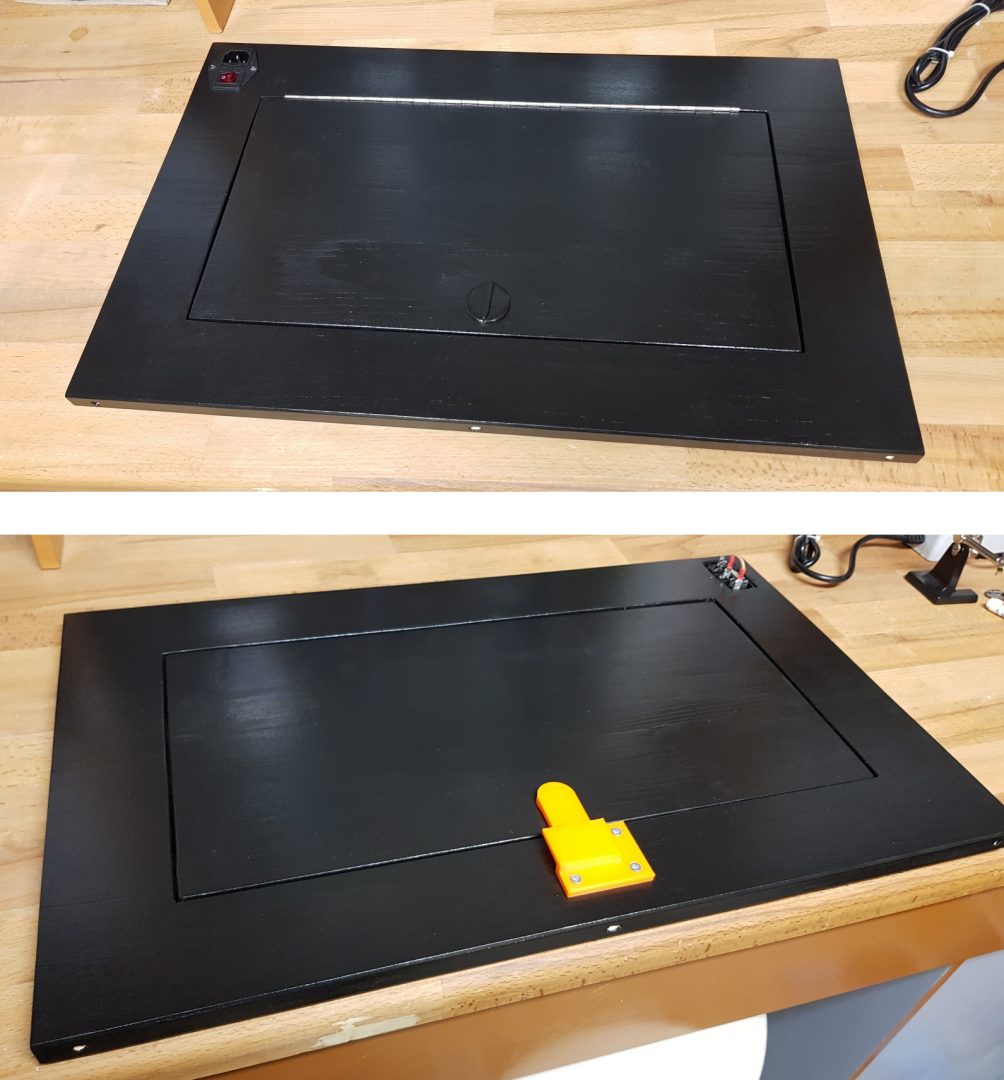
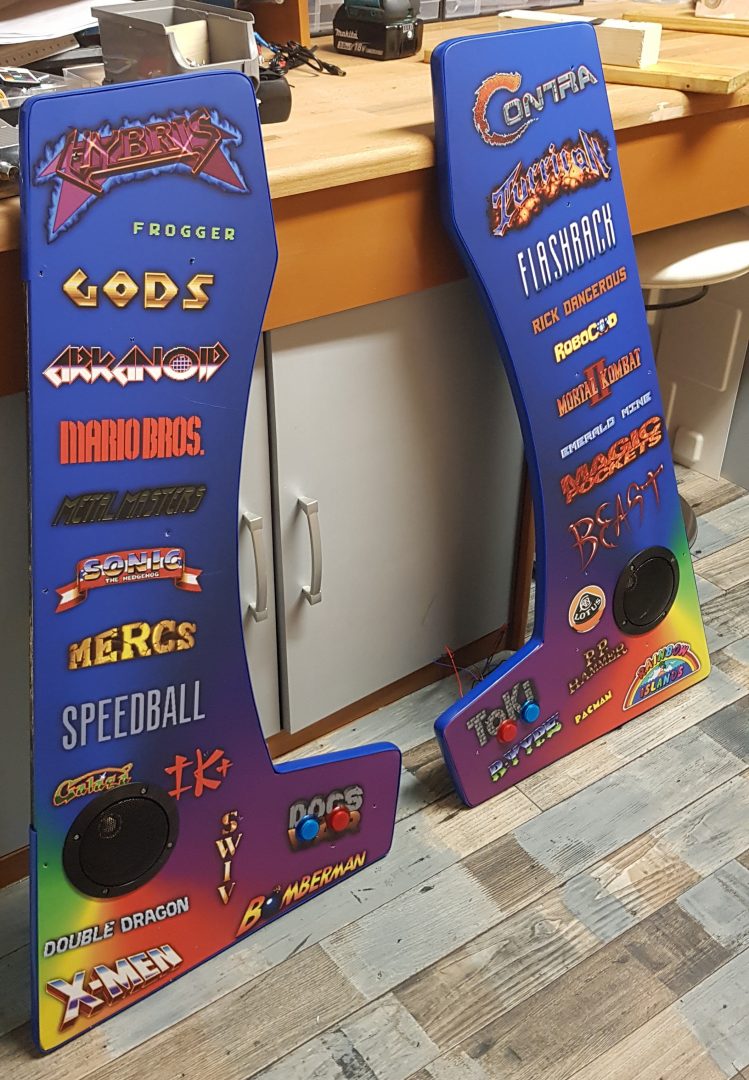
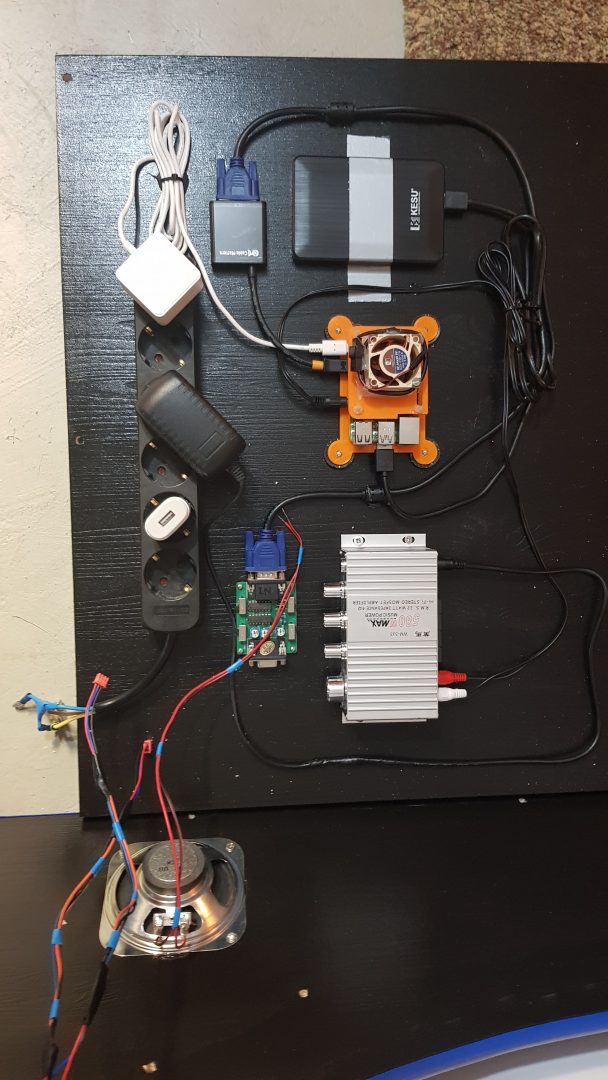
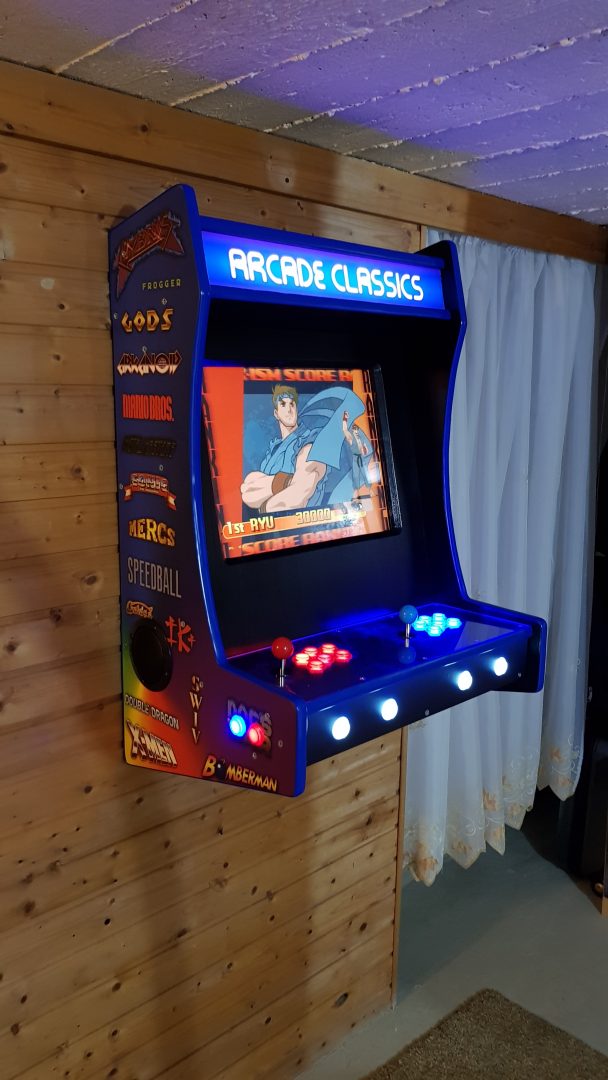
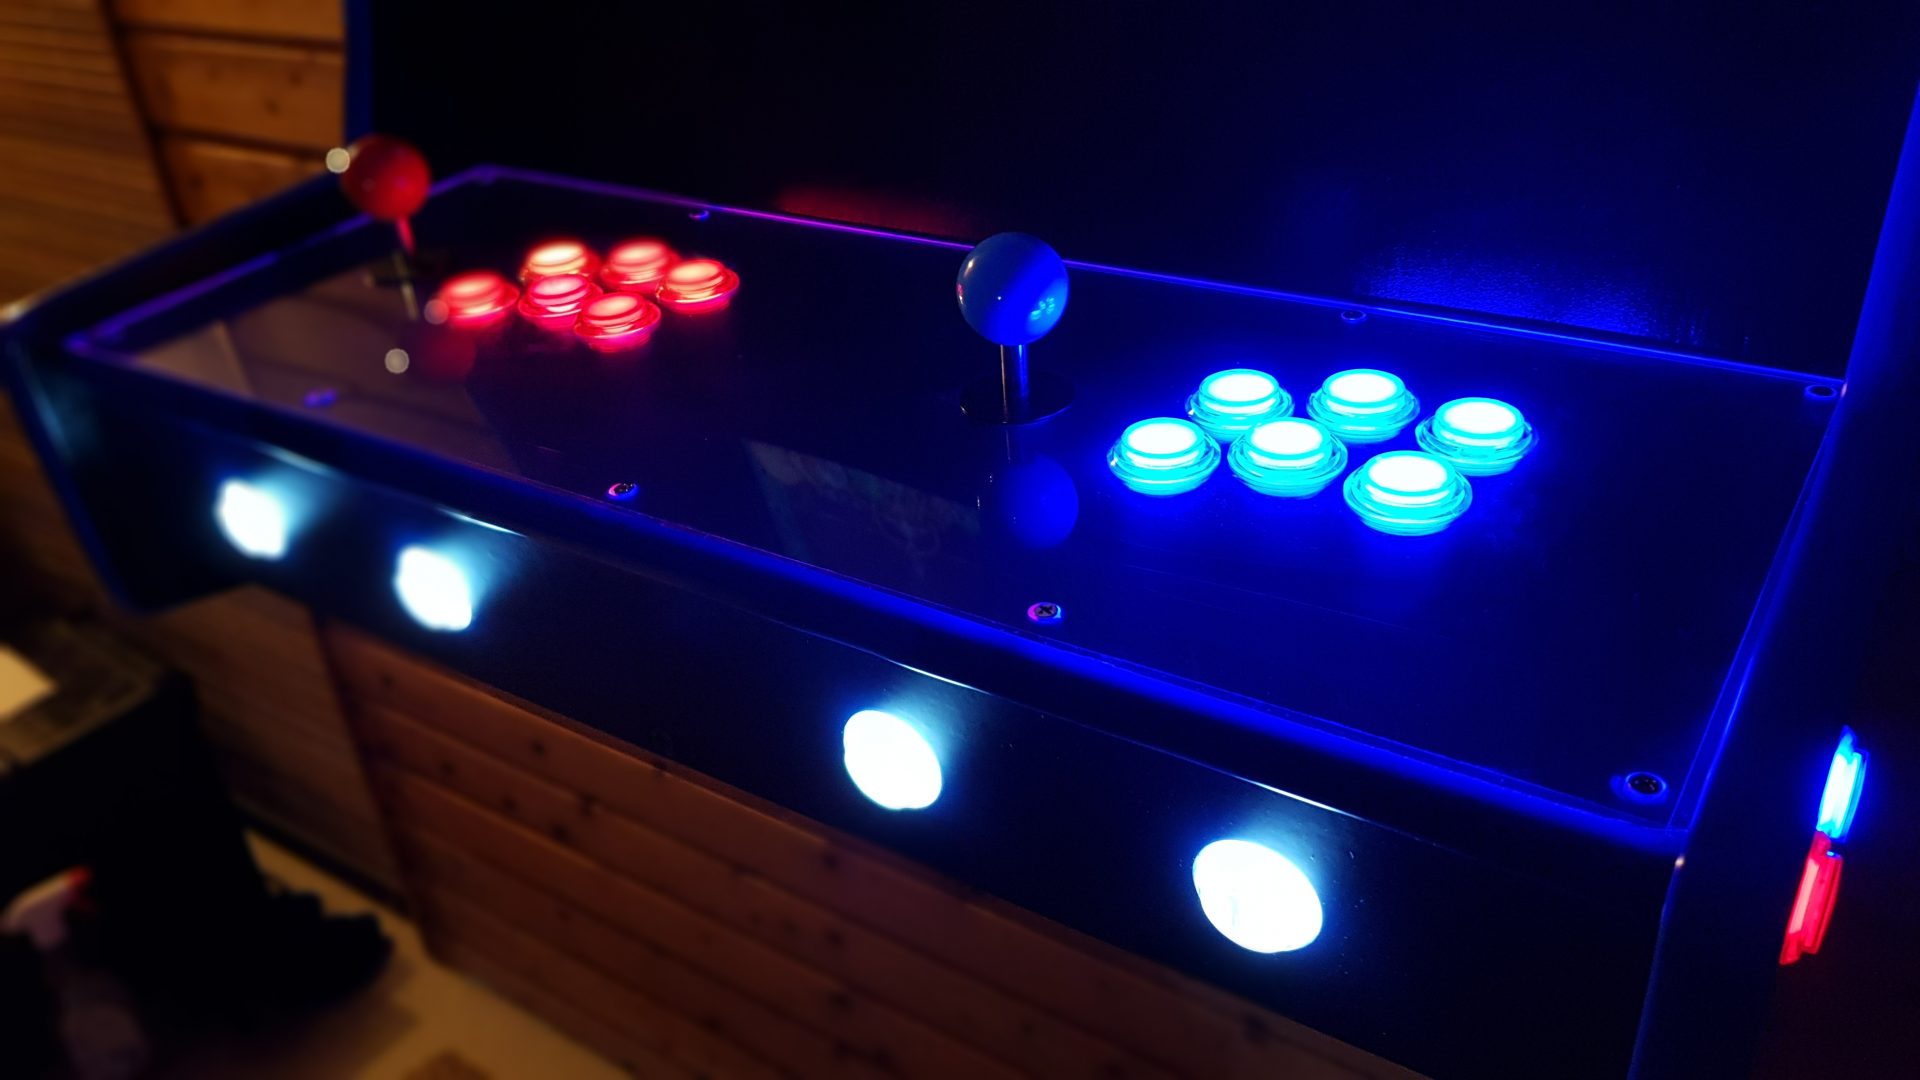
The whole parts cost about 700 euros. Since I am only a hobby craftsman and only have simple devices, it took a long time to set it up (3 Month in total). I gained some experience in woodworking. It was exhausting but it was worth it! Now it’s time to play some of my favourite retro games with my son and my friends.
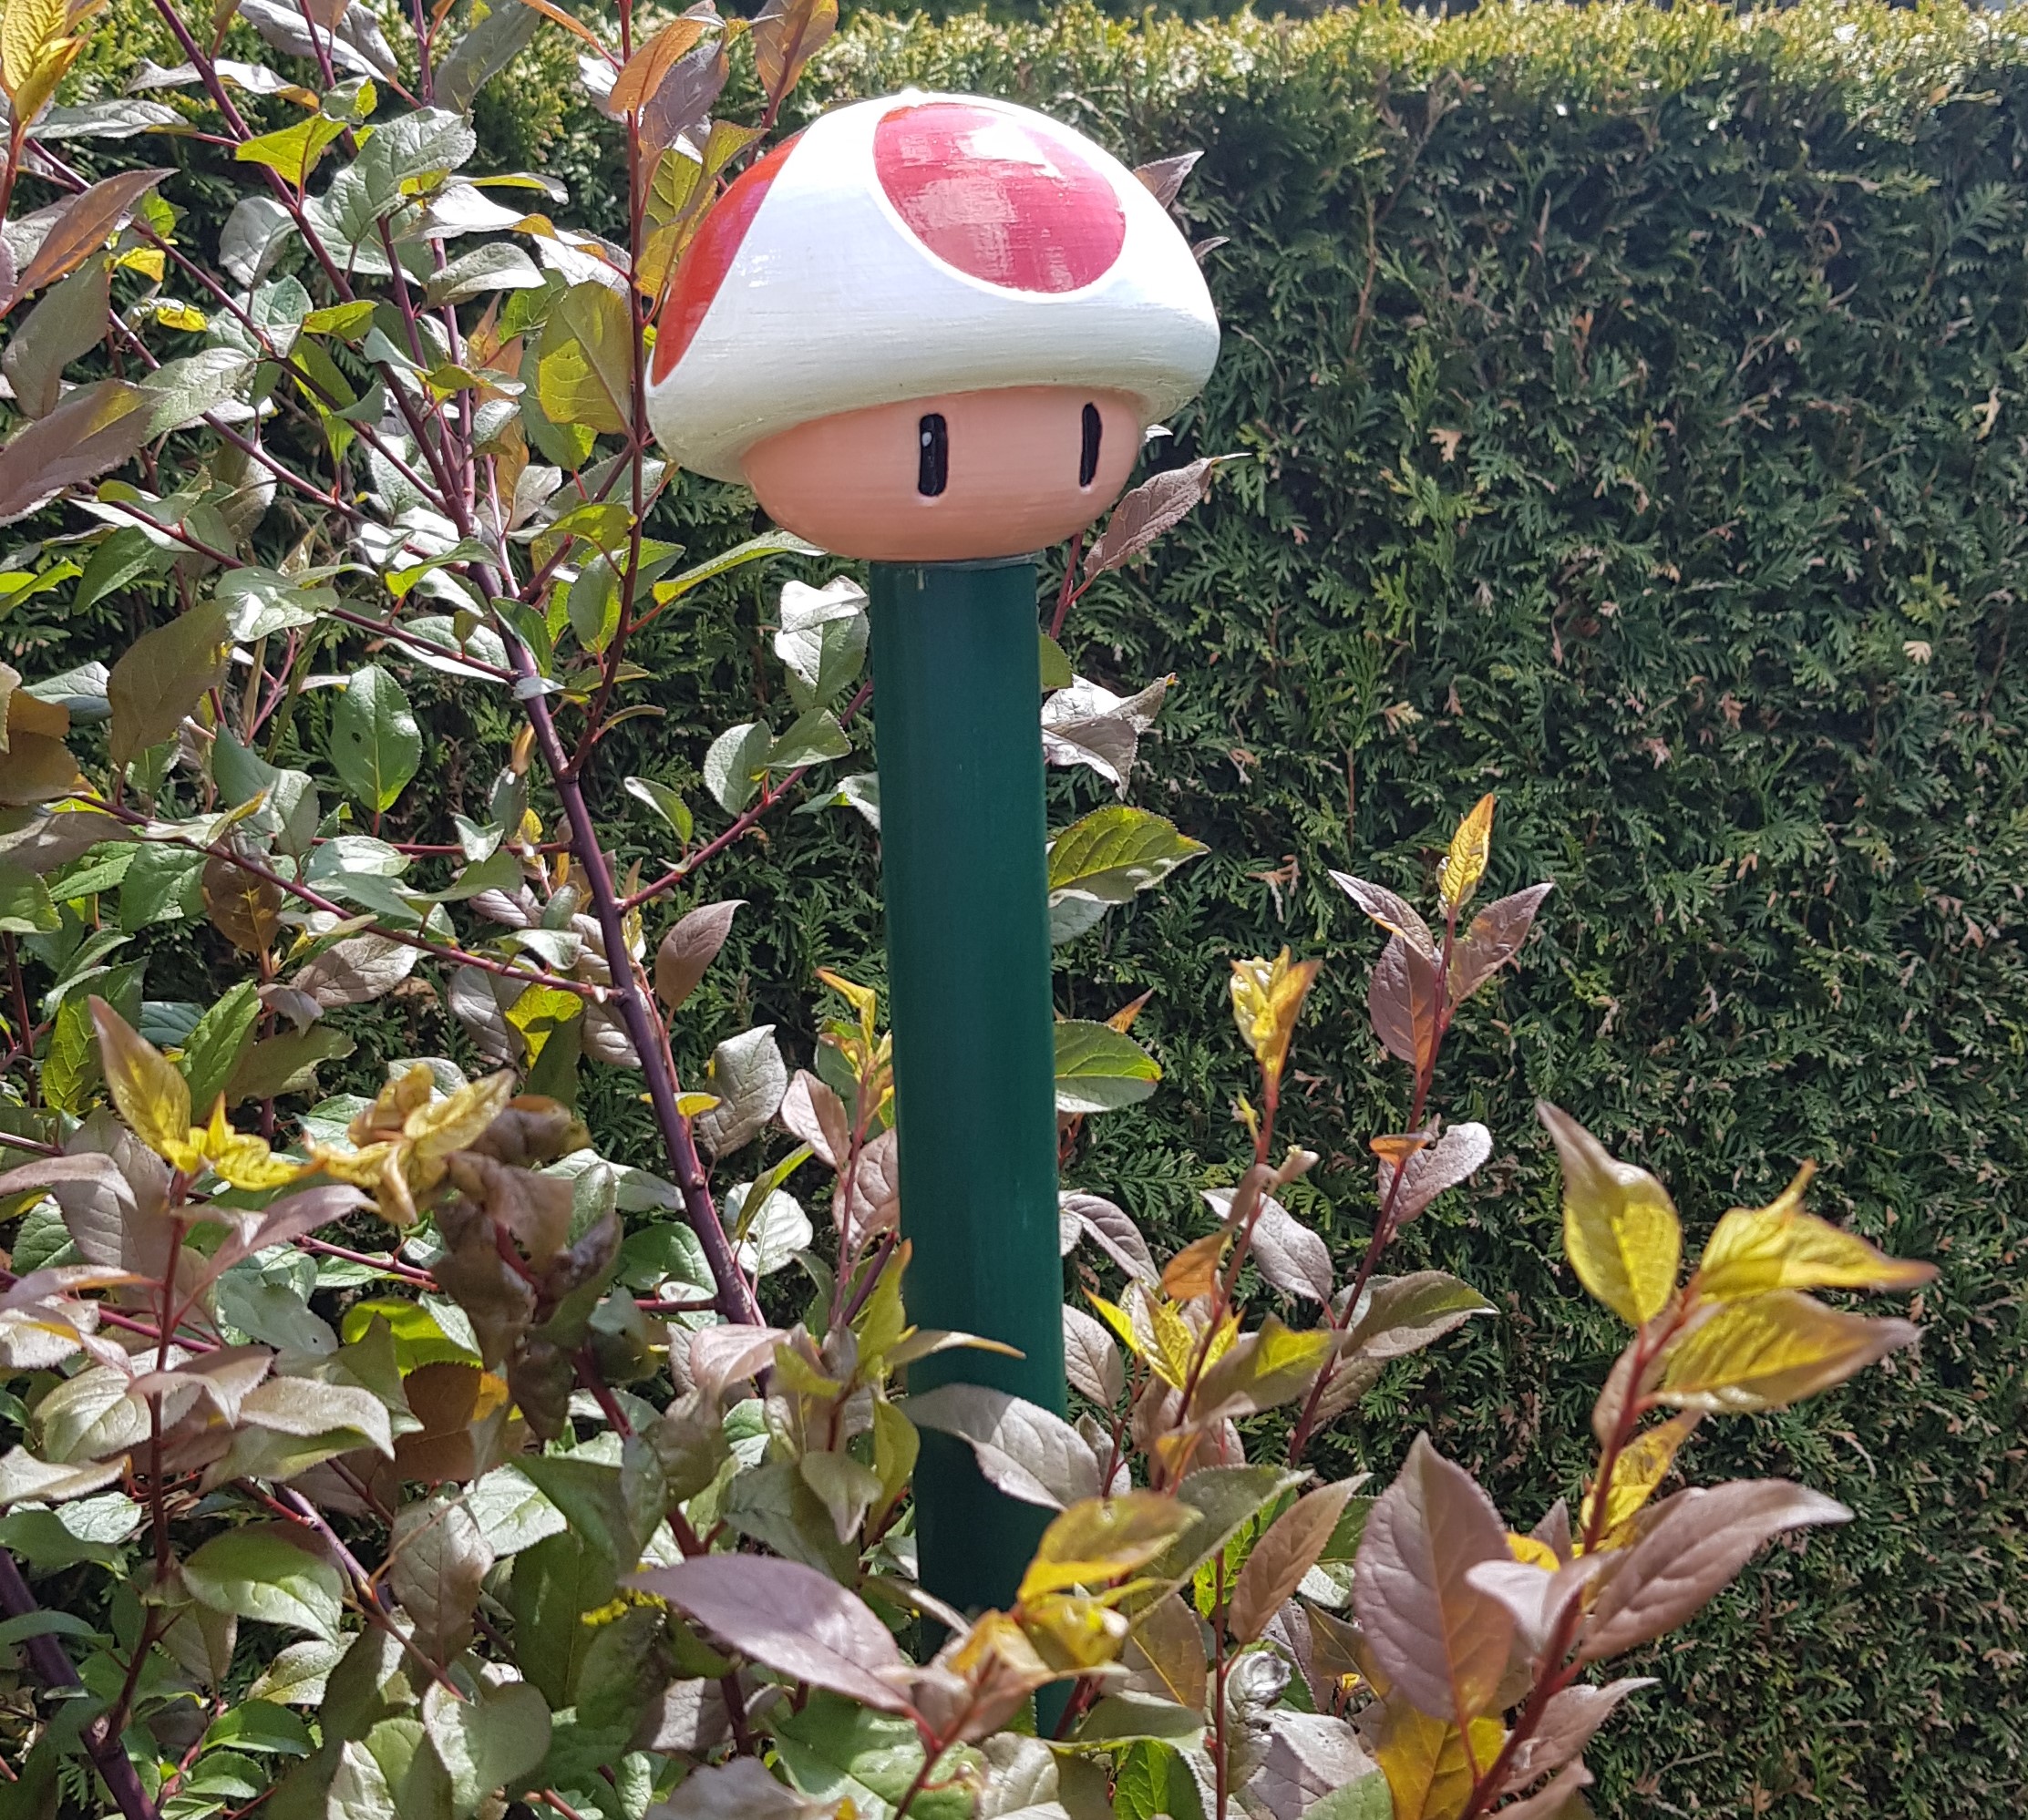
Posted on December 21, 2019
A little gift for my mother
a little gift for my lovely mother

Painted with plastic primer, acrylic paint and matt enamel.
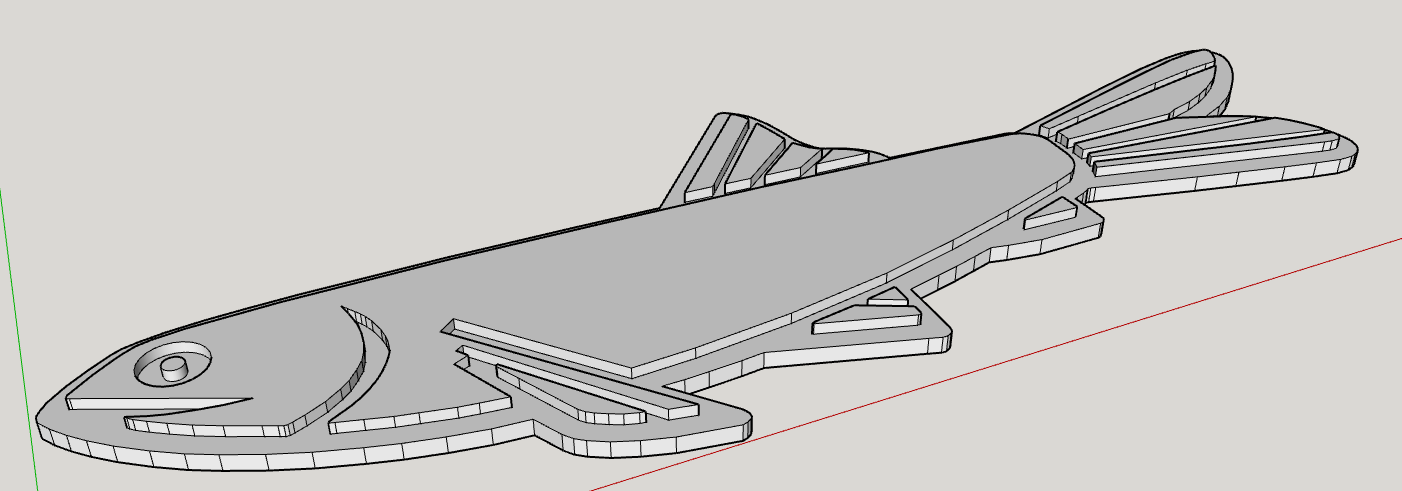
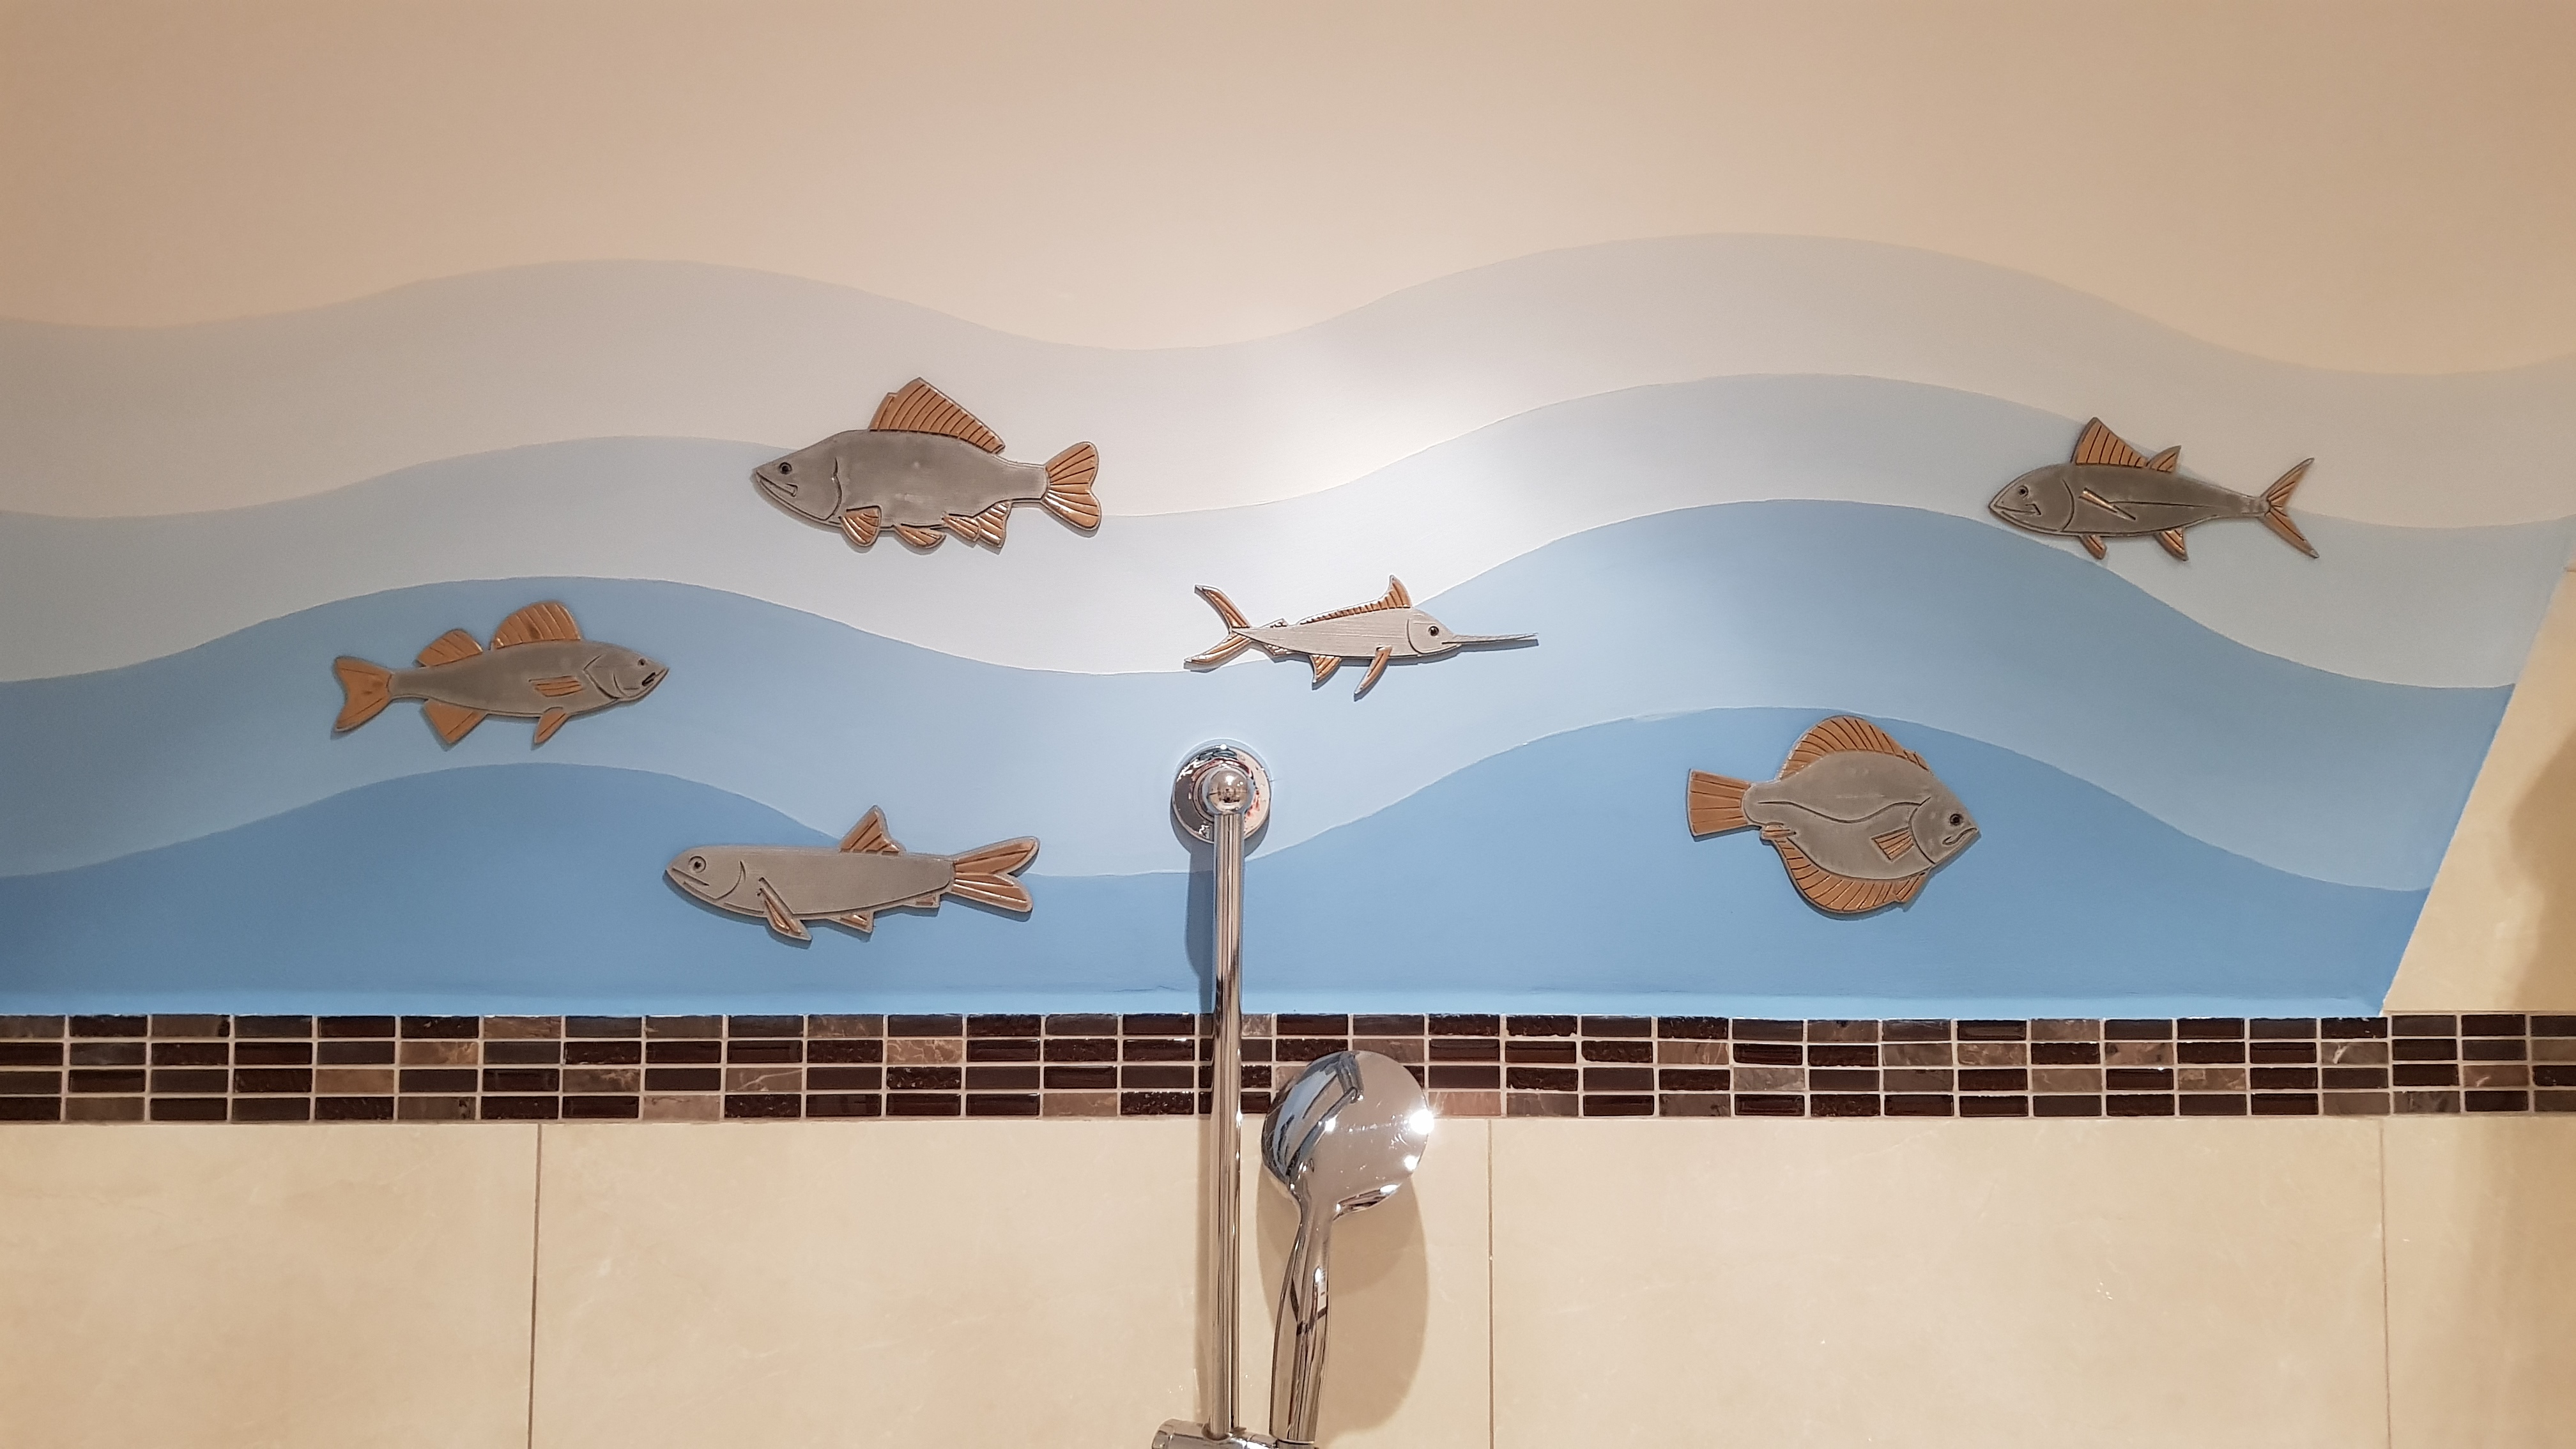
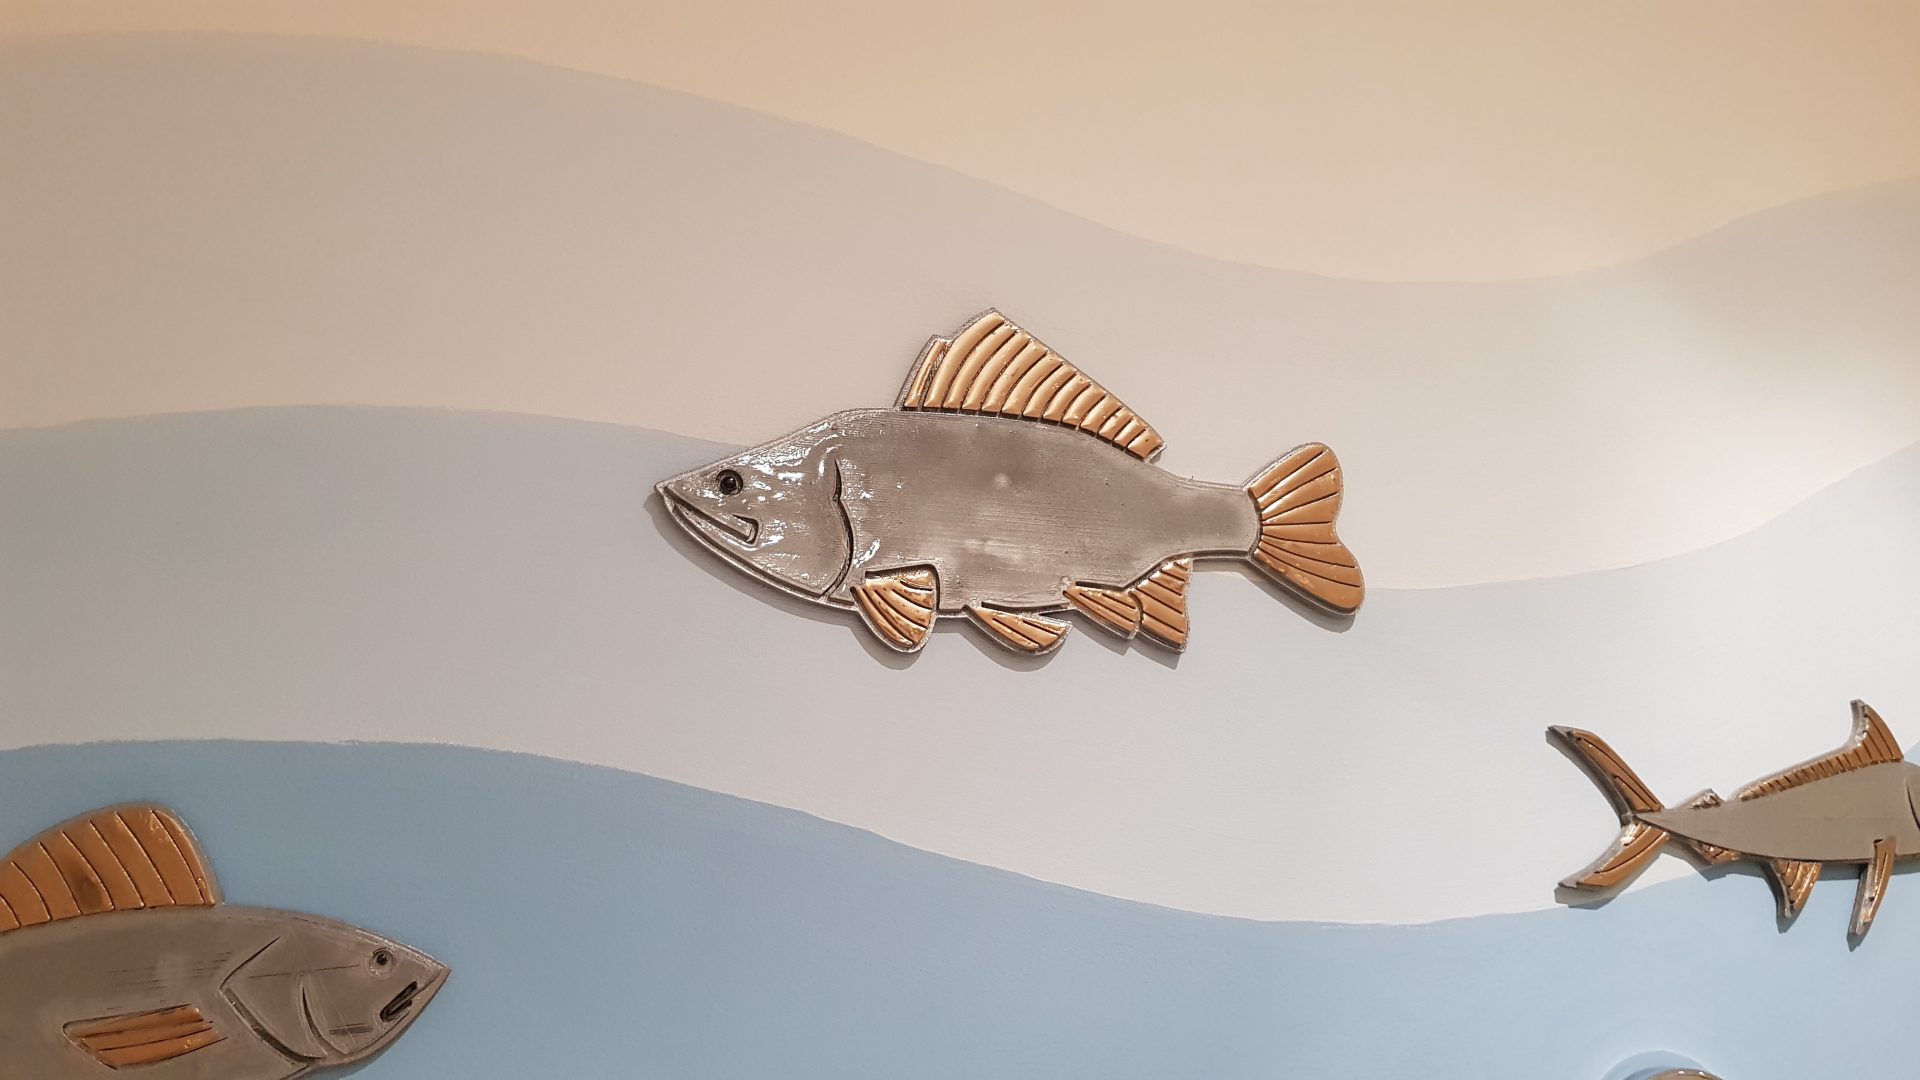
Posted on August 18, 2019
Flounder Wall Decoration
I created a bathroom wall decoration from a 2D line drawing from the internet. My wife likes it 🙂


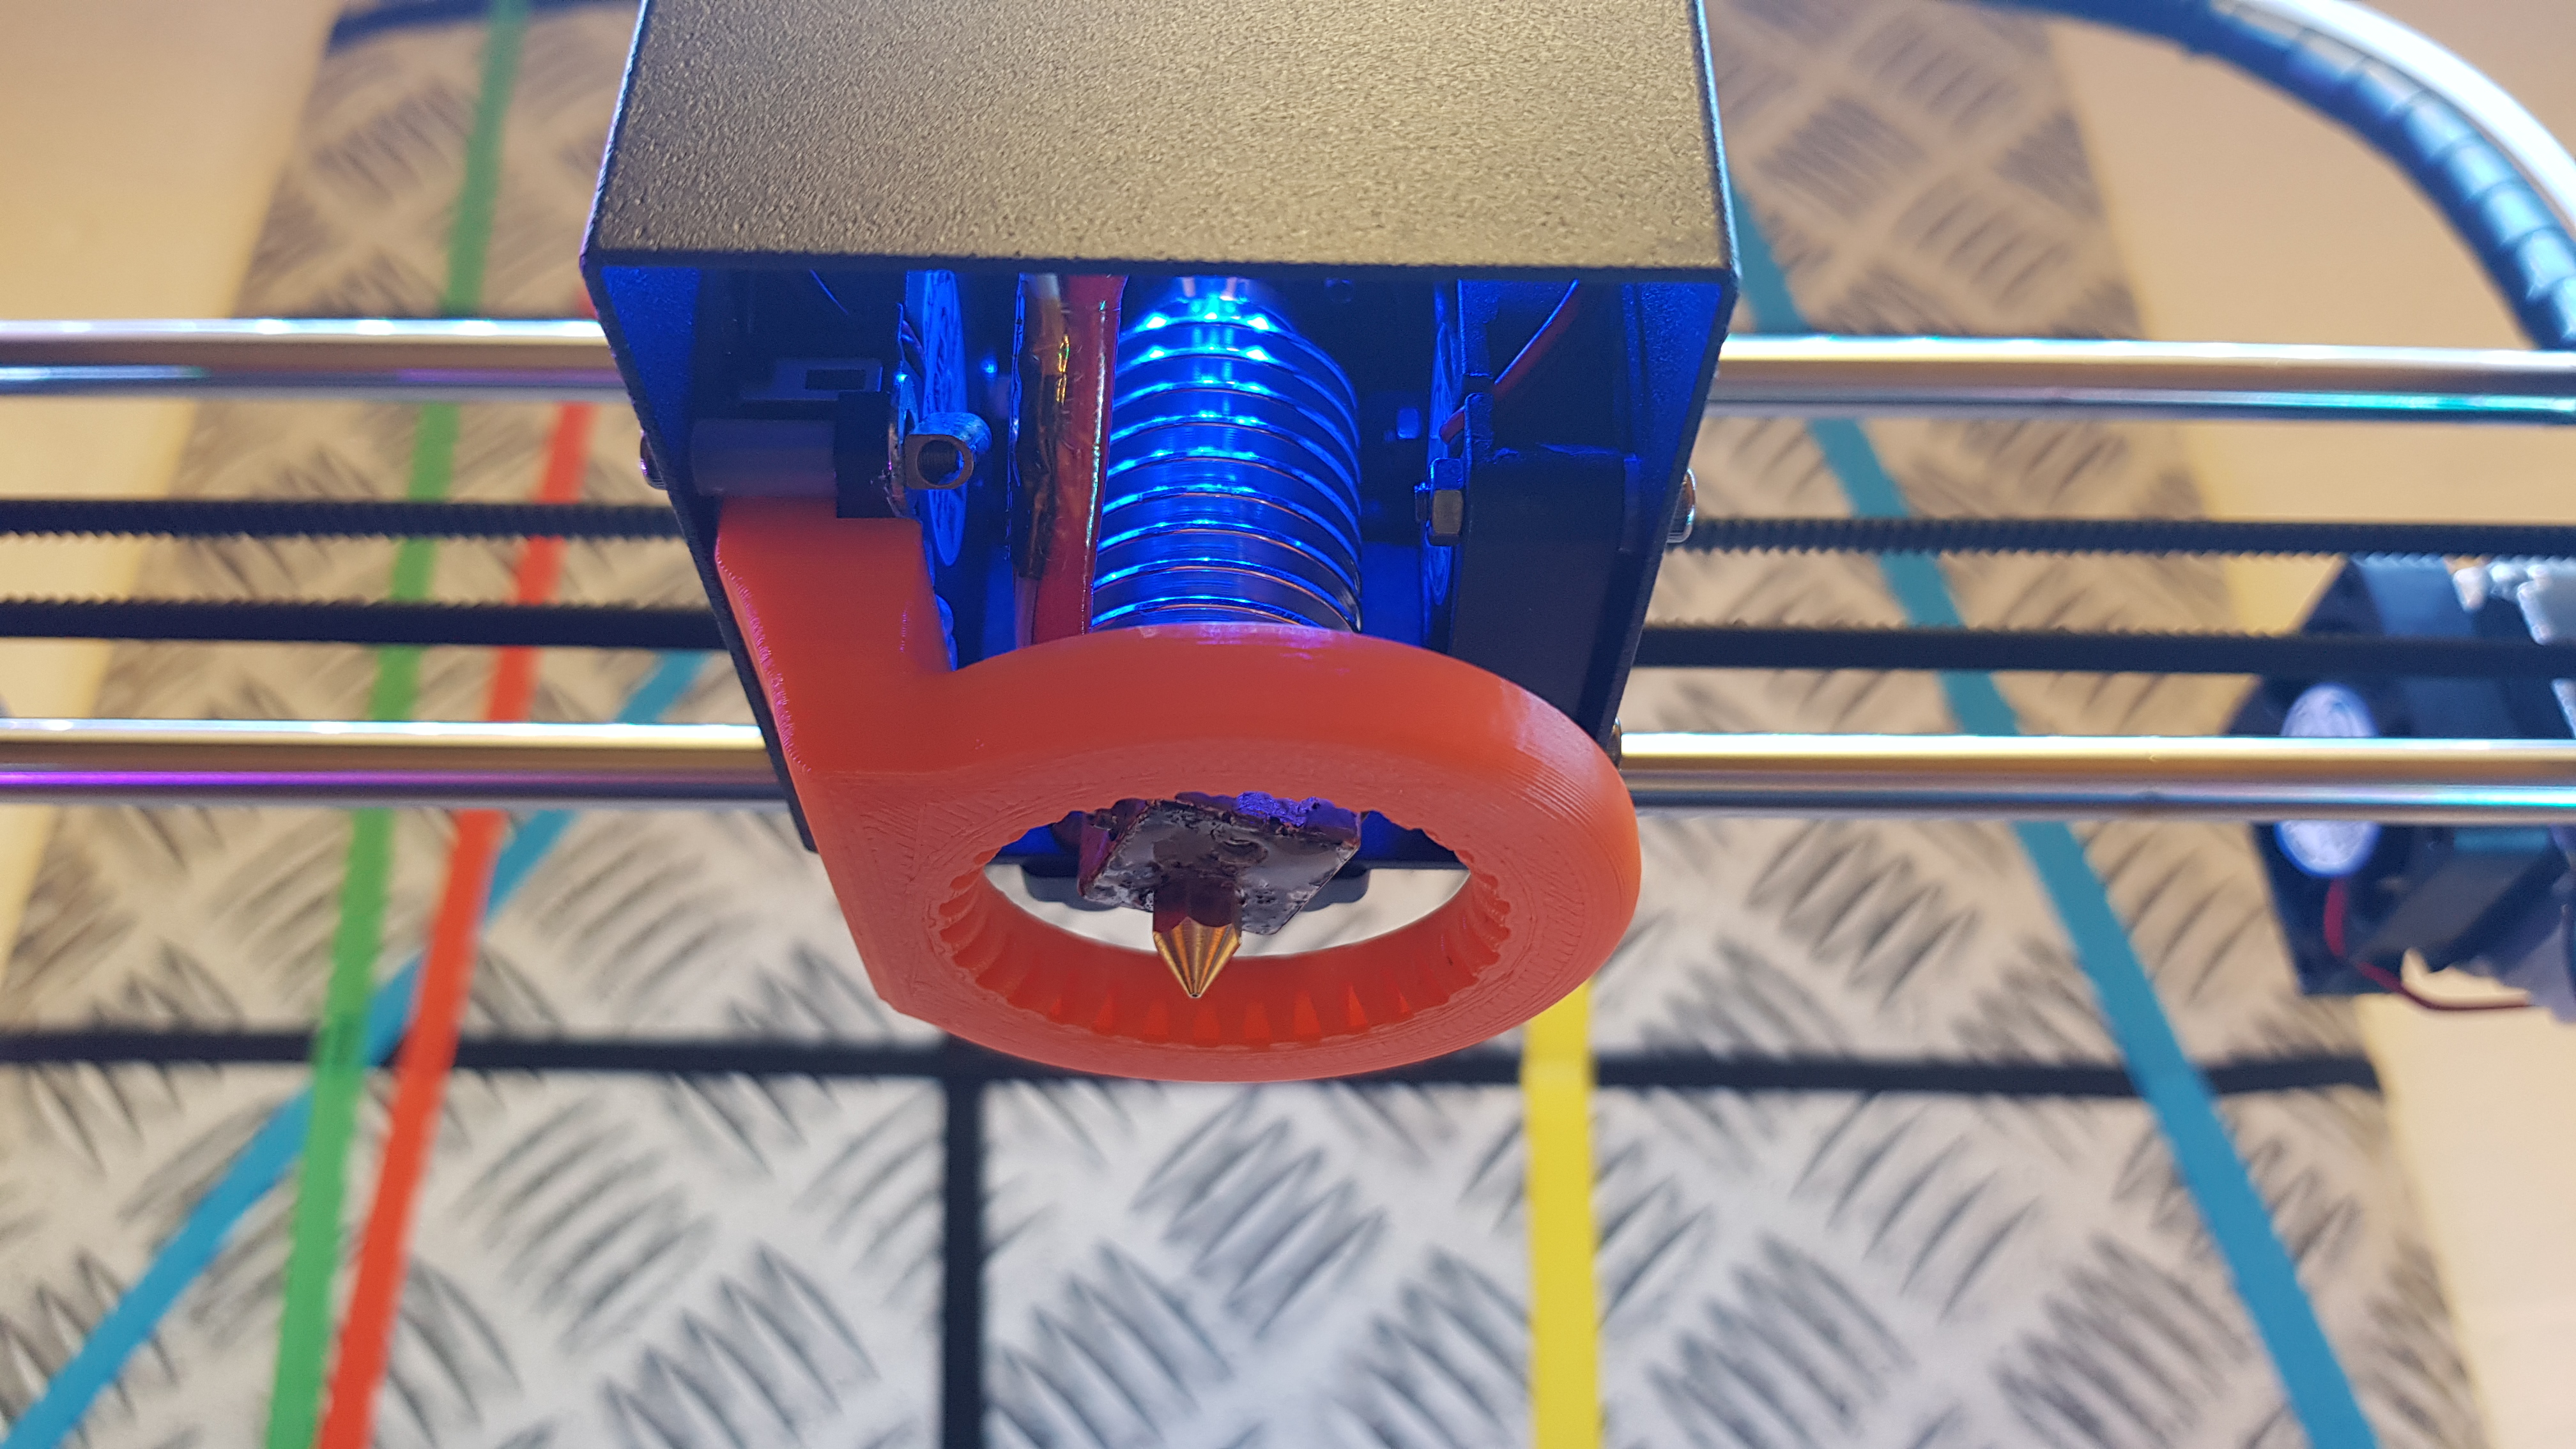
Posted on June 10, 2019
Nozzle Upgrade
I’ve changed the nozzle of my 3D Printer and mounted a new fan duct from Mileshkin that blows the air evenly from all sides. I’ve also added a little led strip that indicates that the nozzle is heated.
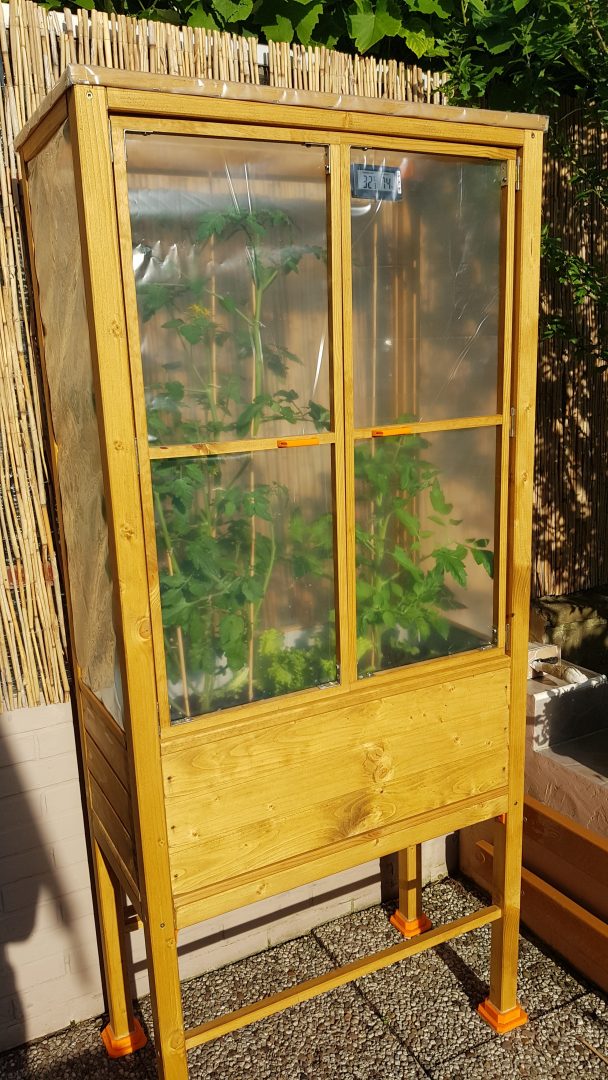
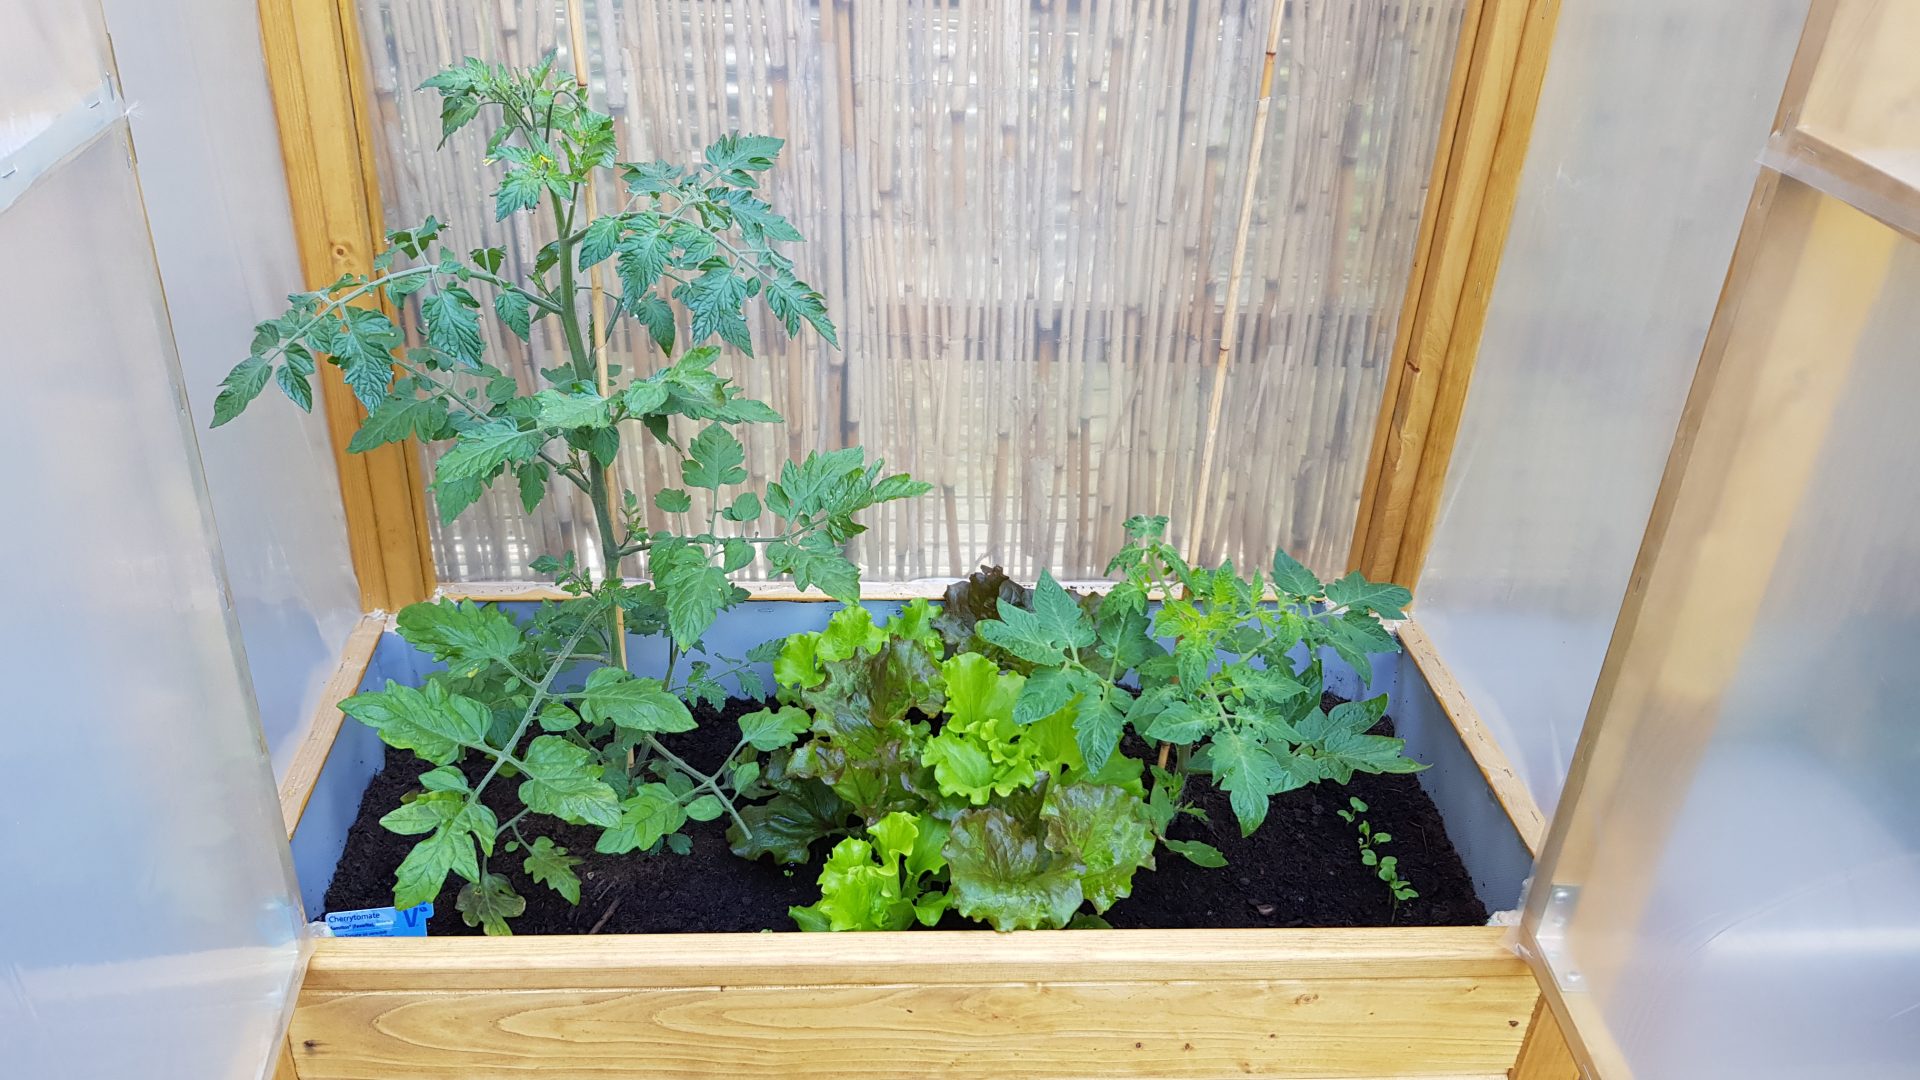
Posted on April 18, 2019
Tomato Green House
I’ve build a little green house. It’s intresting and relaxing to to take care of the plants and watch them grow
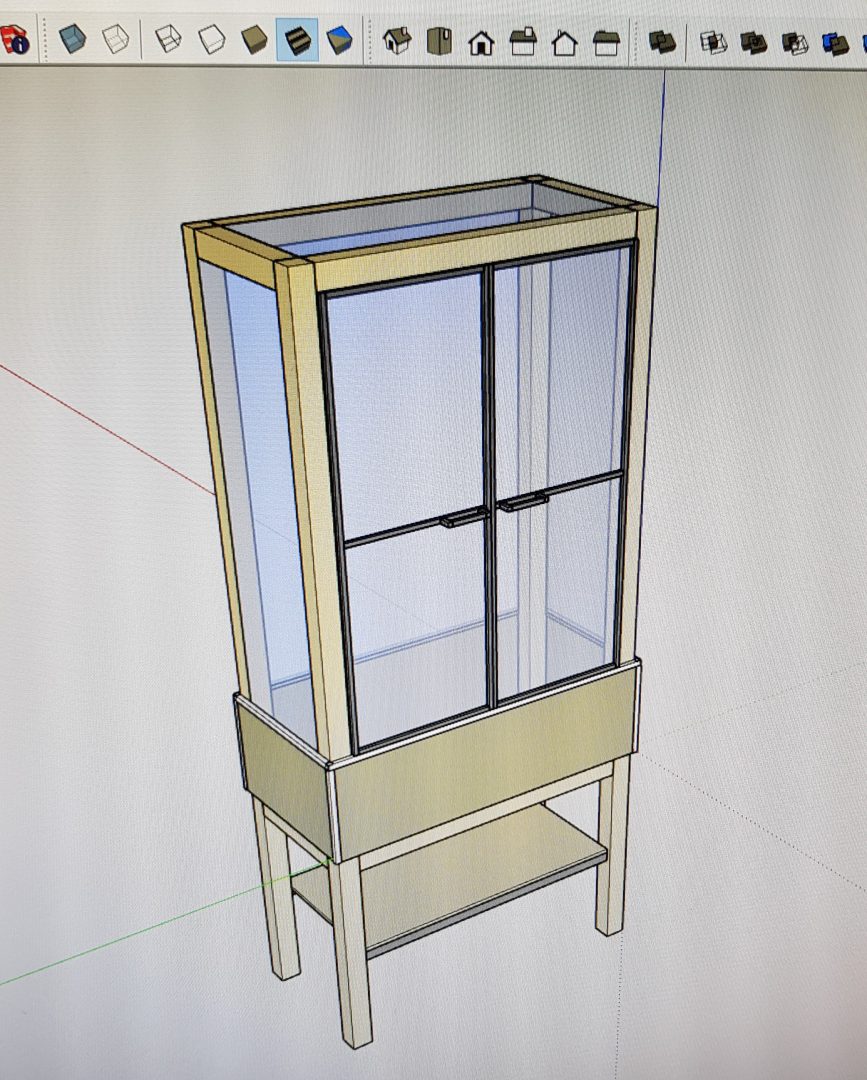
Deisgned with Google Sketchup 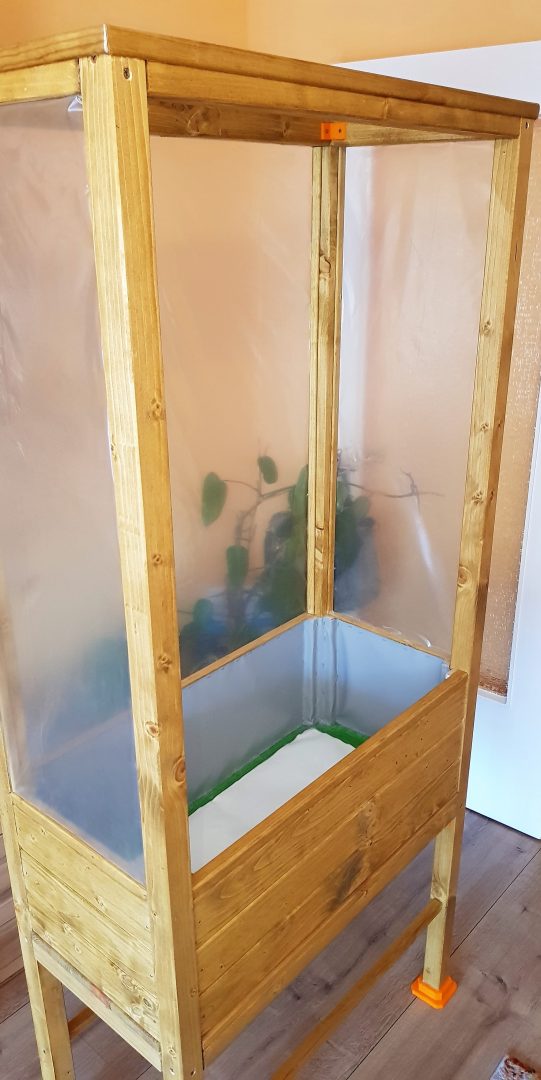
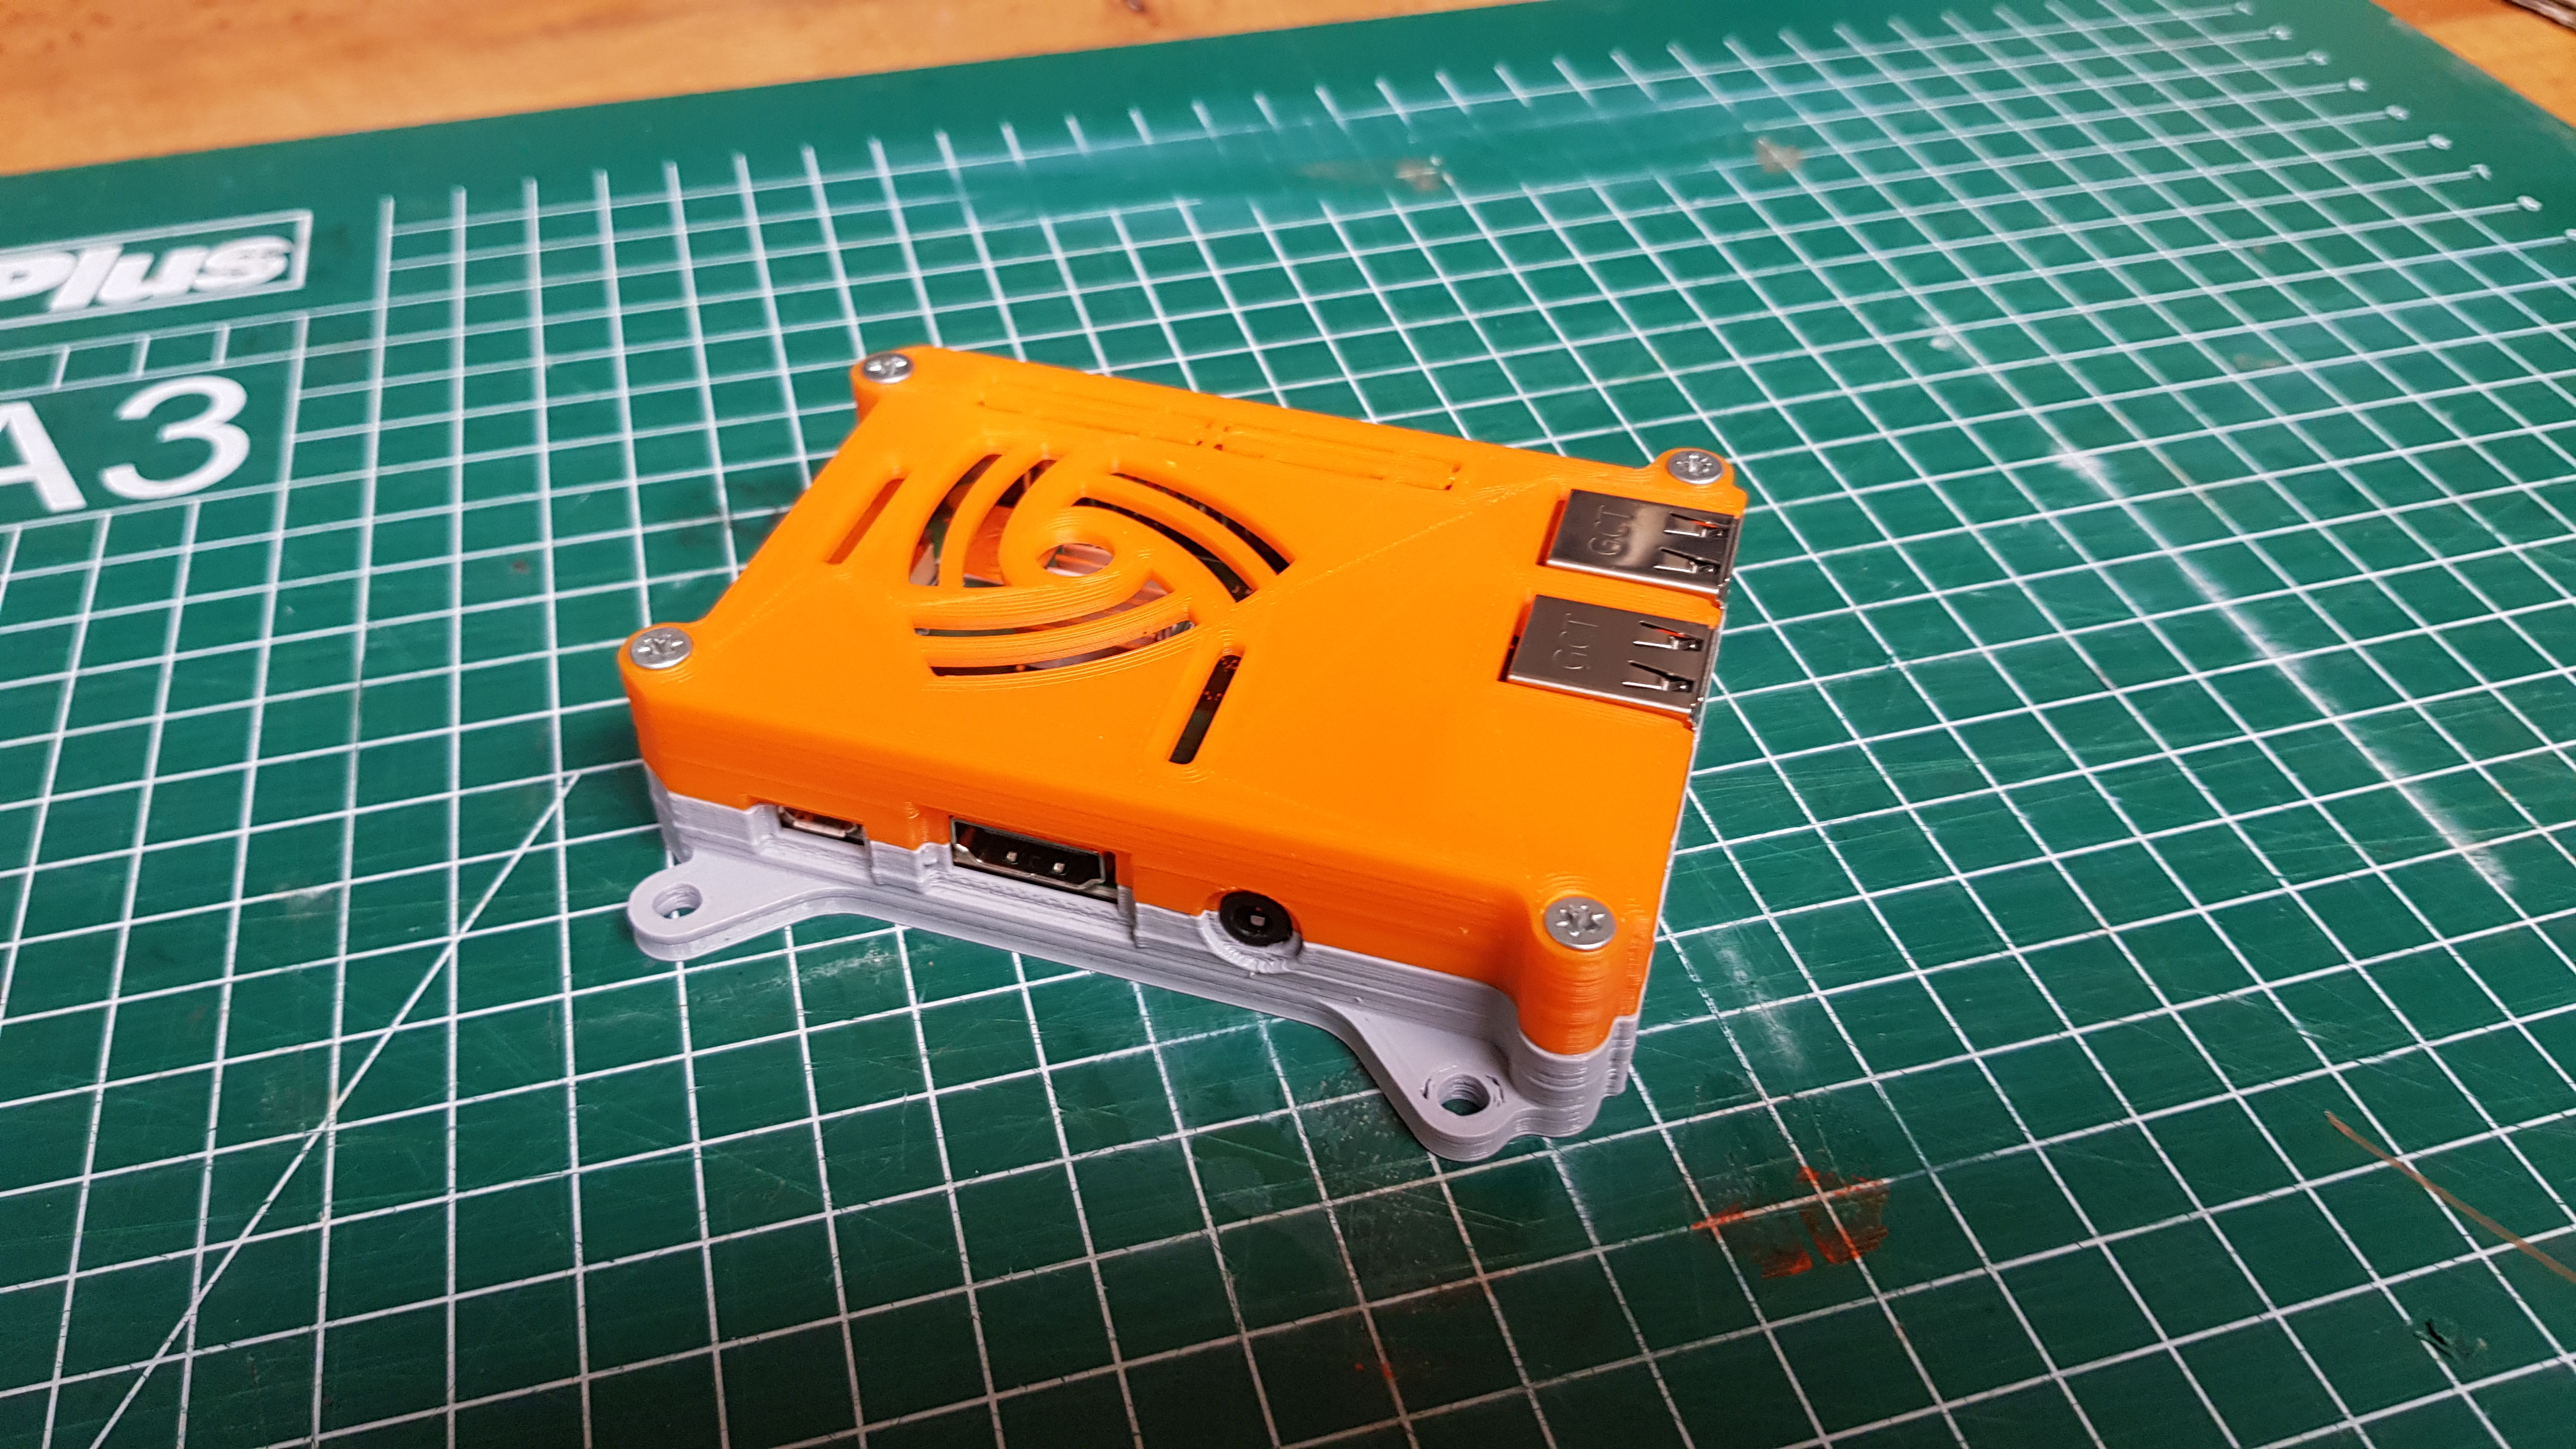
Posted on January 22, 2019
3D Printing
I bought the Anycubic I3 Mega 3D Printer from Ali Express The printer is robust and easy to assemble an the print quality is quite good. Here are some sample prints with low quality (fast print) settings:
I’ve designed and printed a Lithophane lightbox as a gift for my father 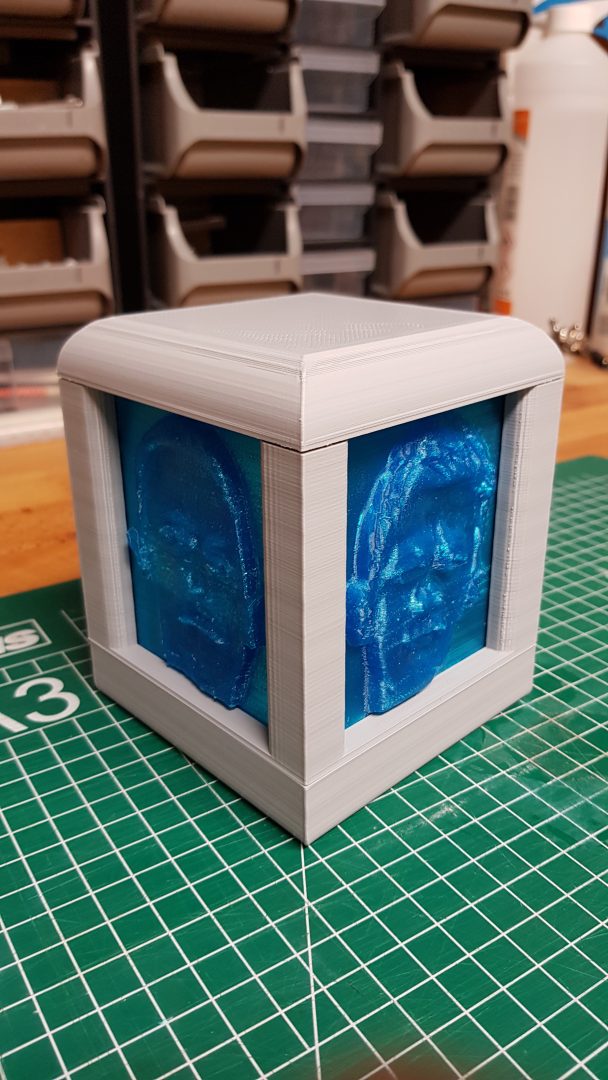
It looks a bit ugly in the bright but has a unique 3d effect in the dark

Posted on November 7, 2015
Playing around with neuronal networks
I’ve build my own network simulator. I was inspired by the book “Geist im Netz” from Dr. Manfred Spitzer.
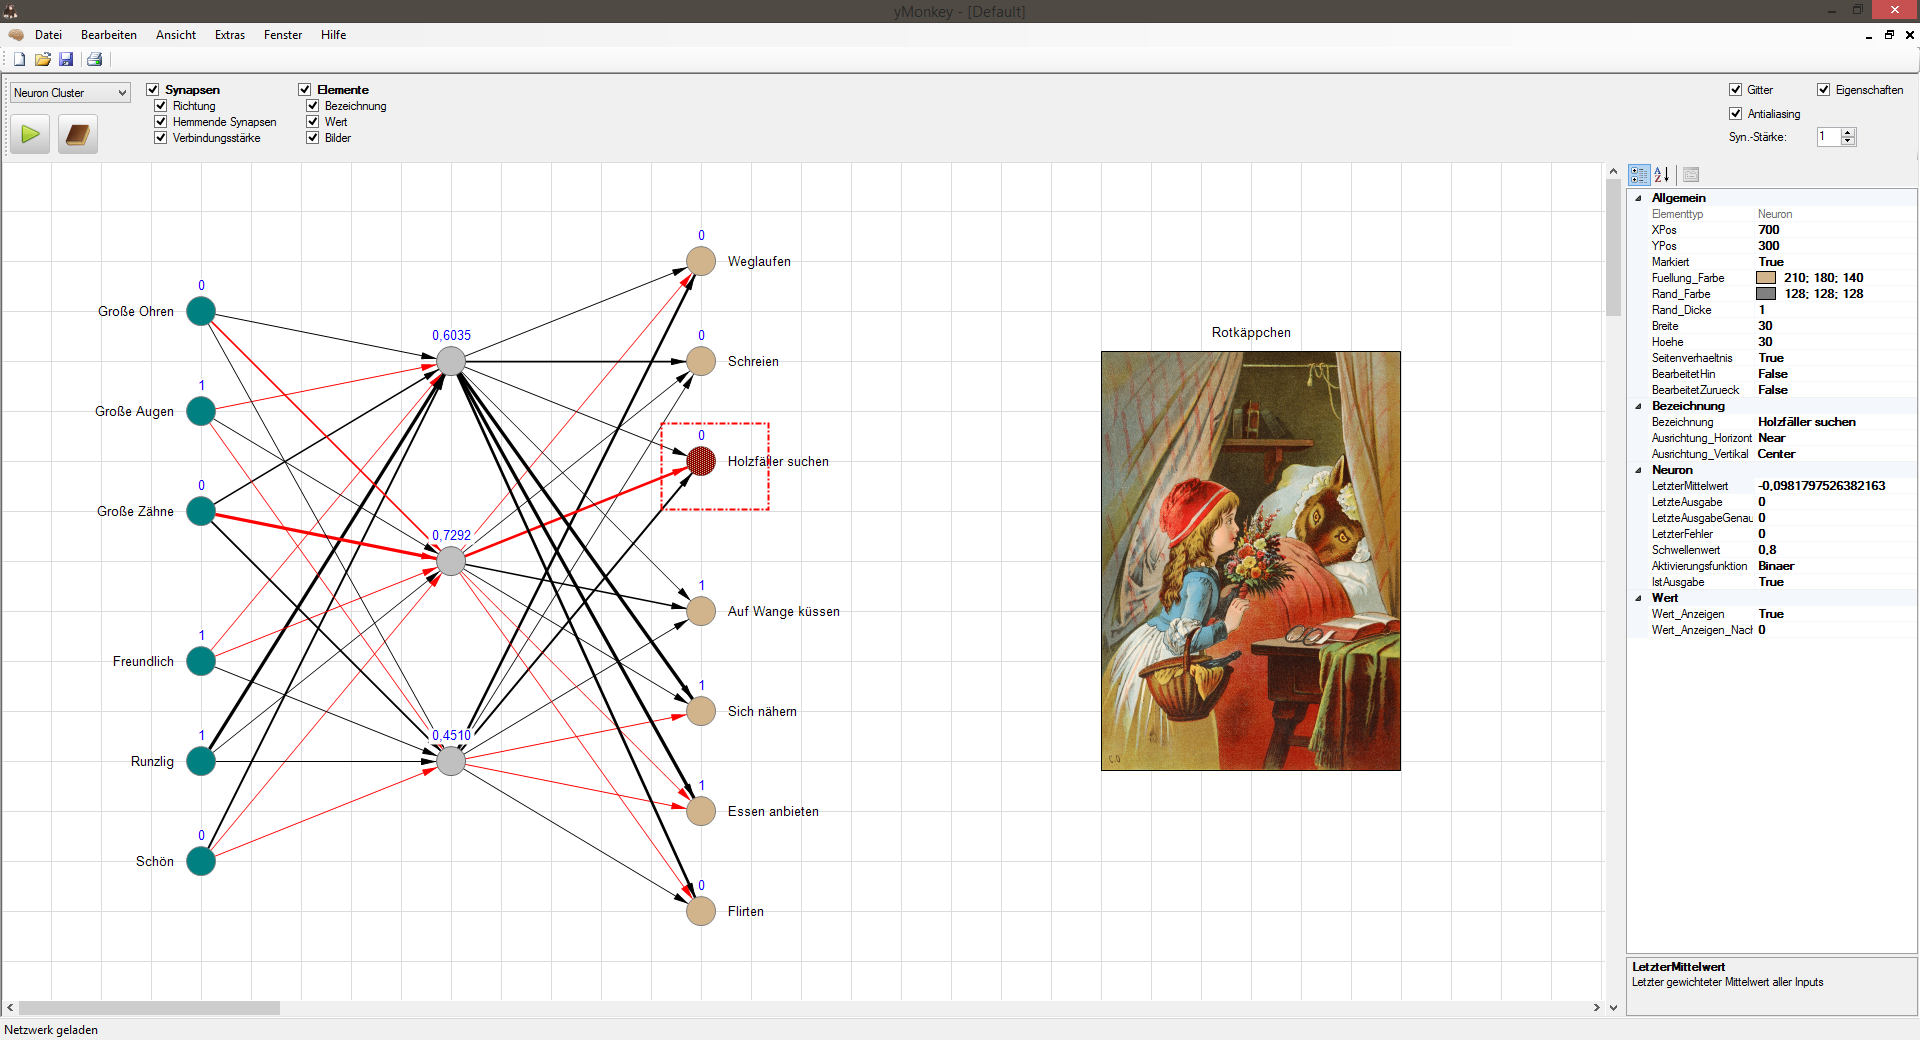

binding neurons to training data 
training data 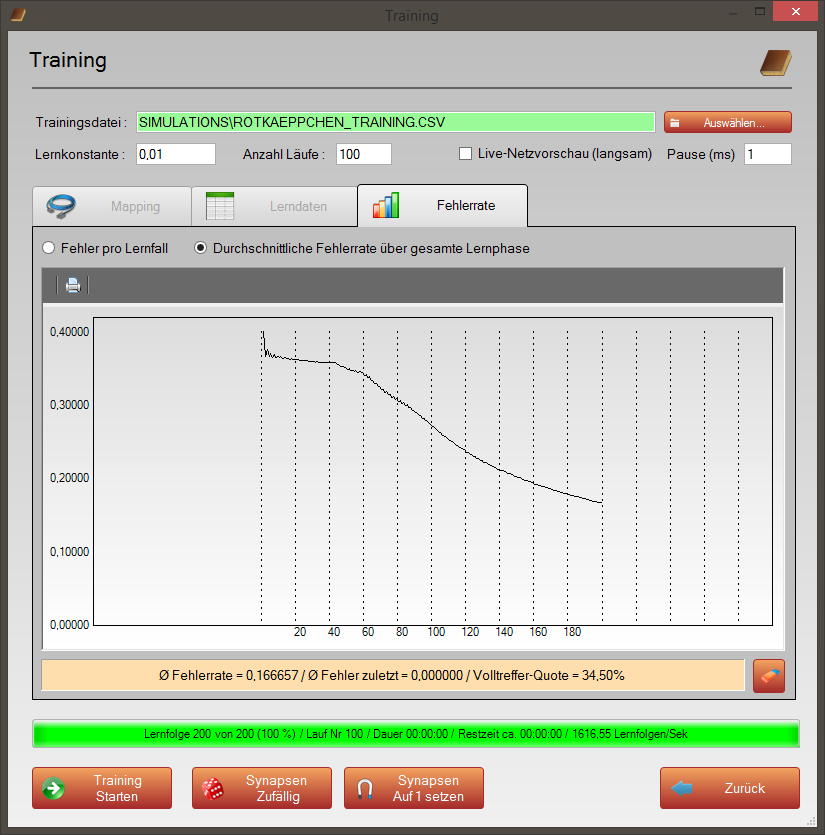
Error rate curve
Posted on June 29, 2014
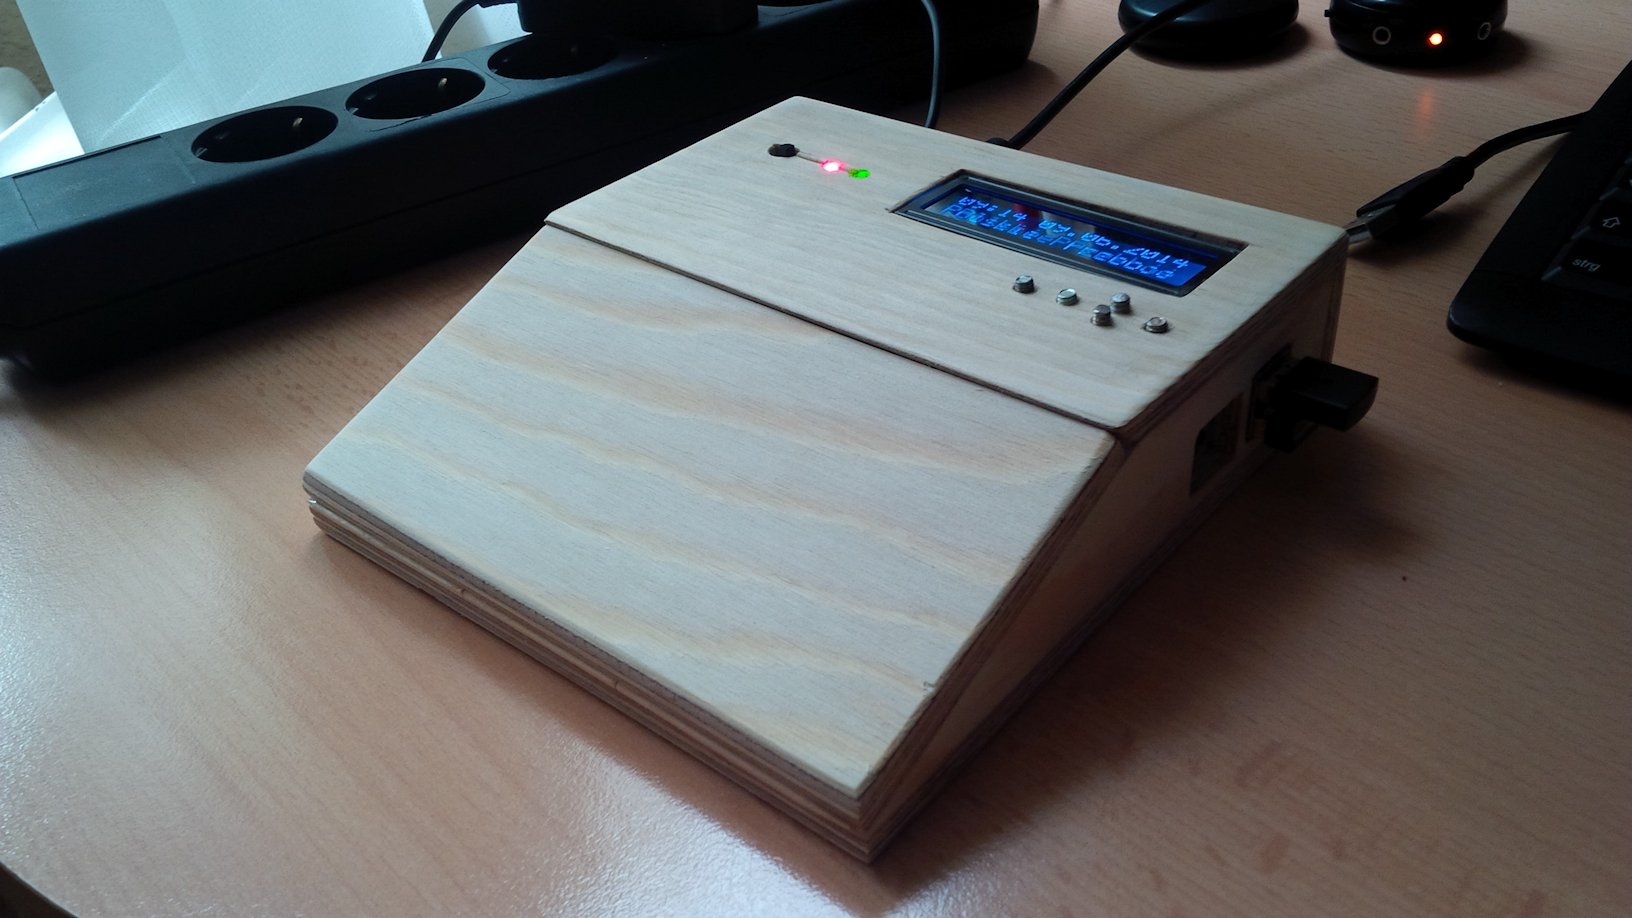
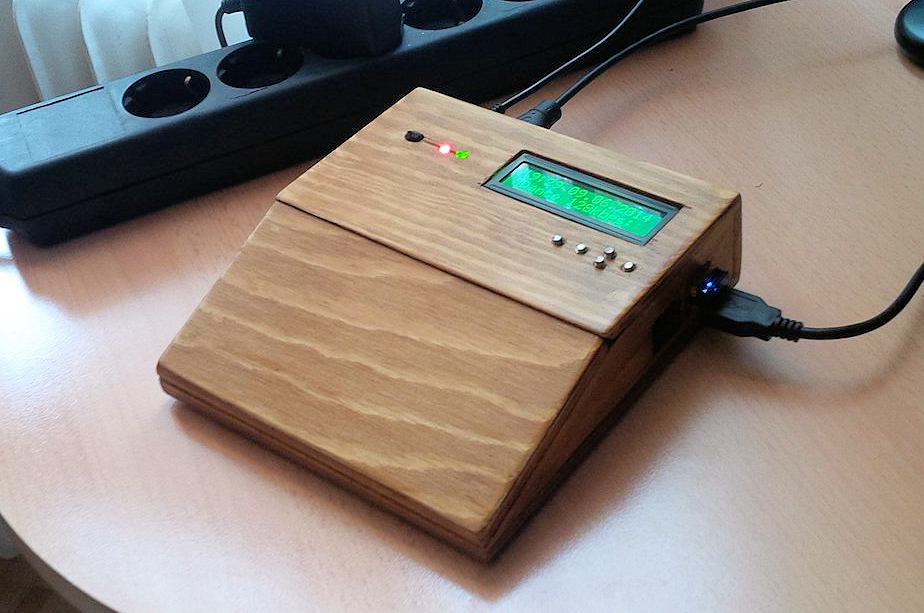
Retro Game Console
I’ve build my own retro gaming console with internet radio. It’s based on the Raspberry Pi. The design is based on the Atari 2600 (1986 Version)
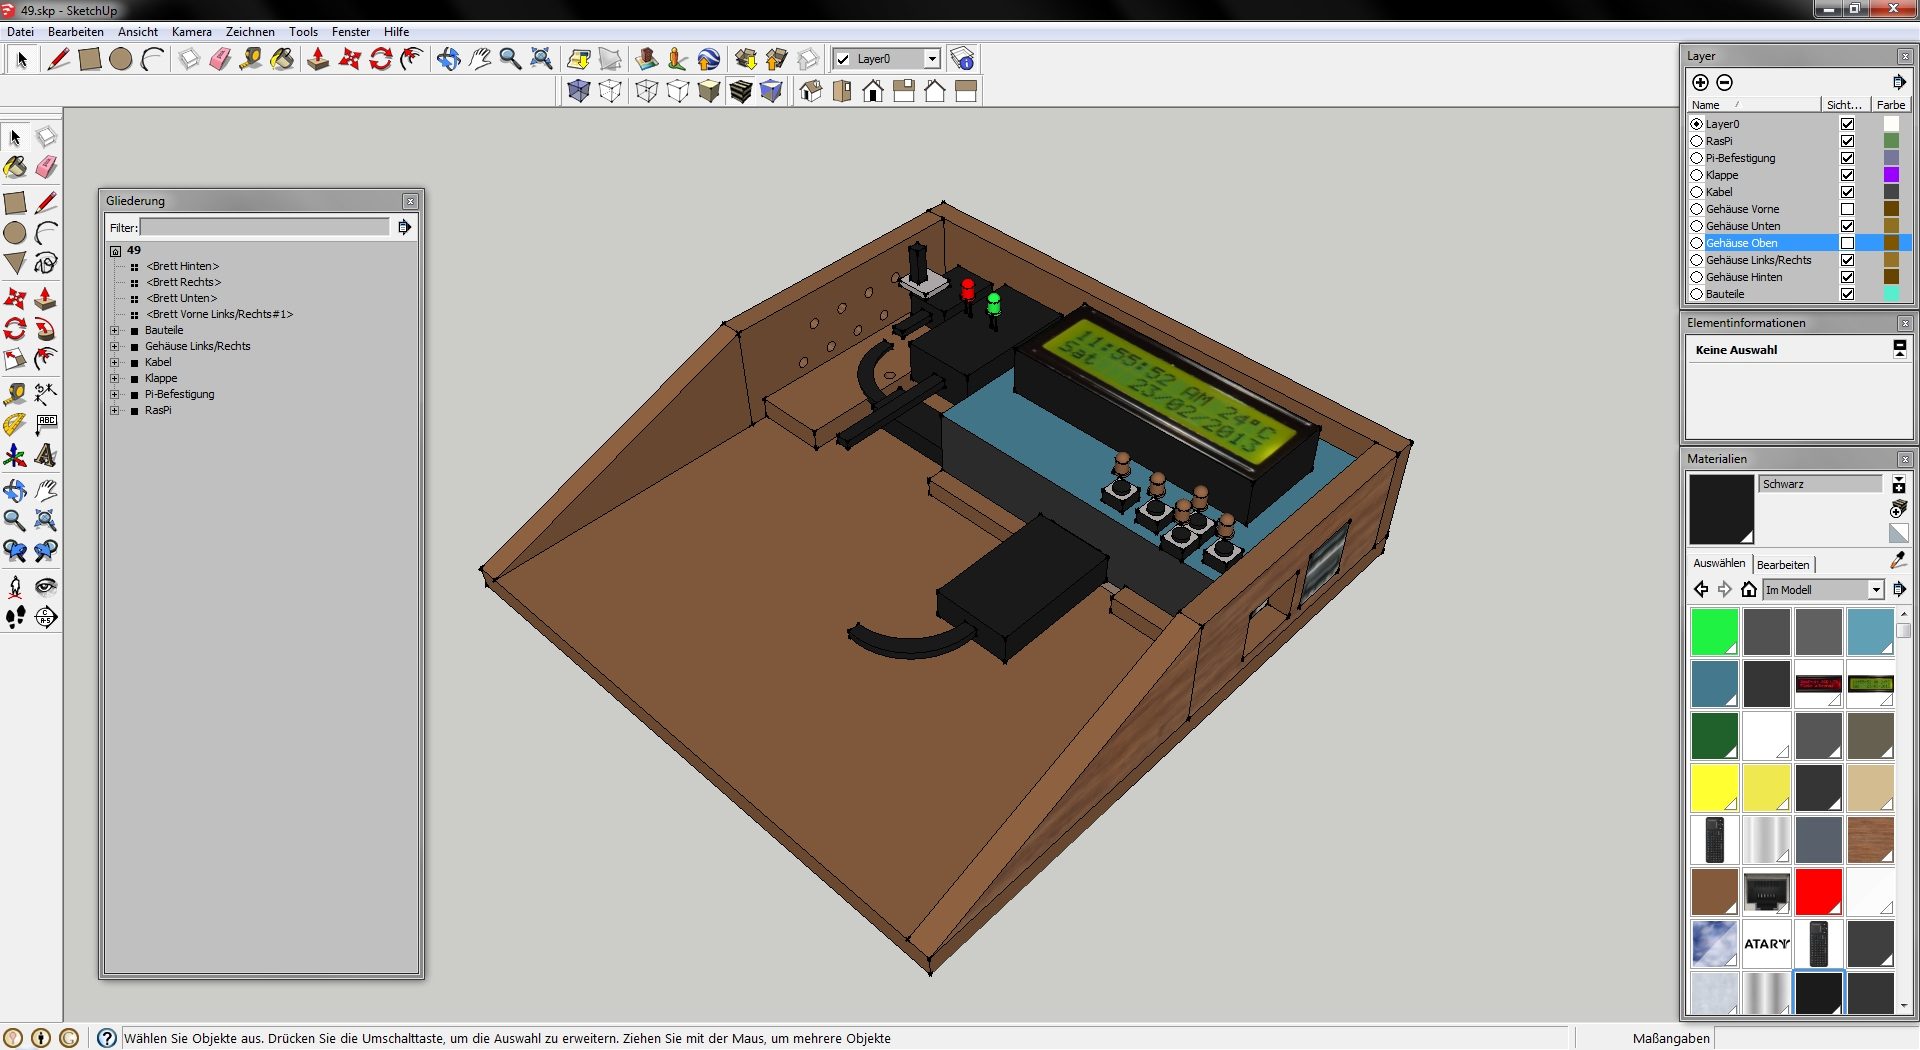

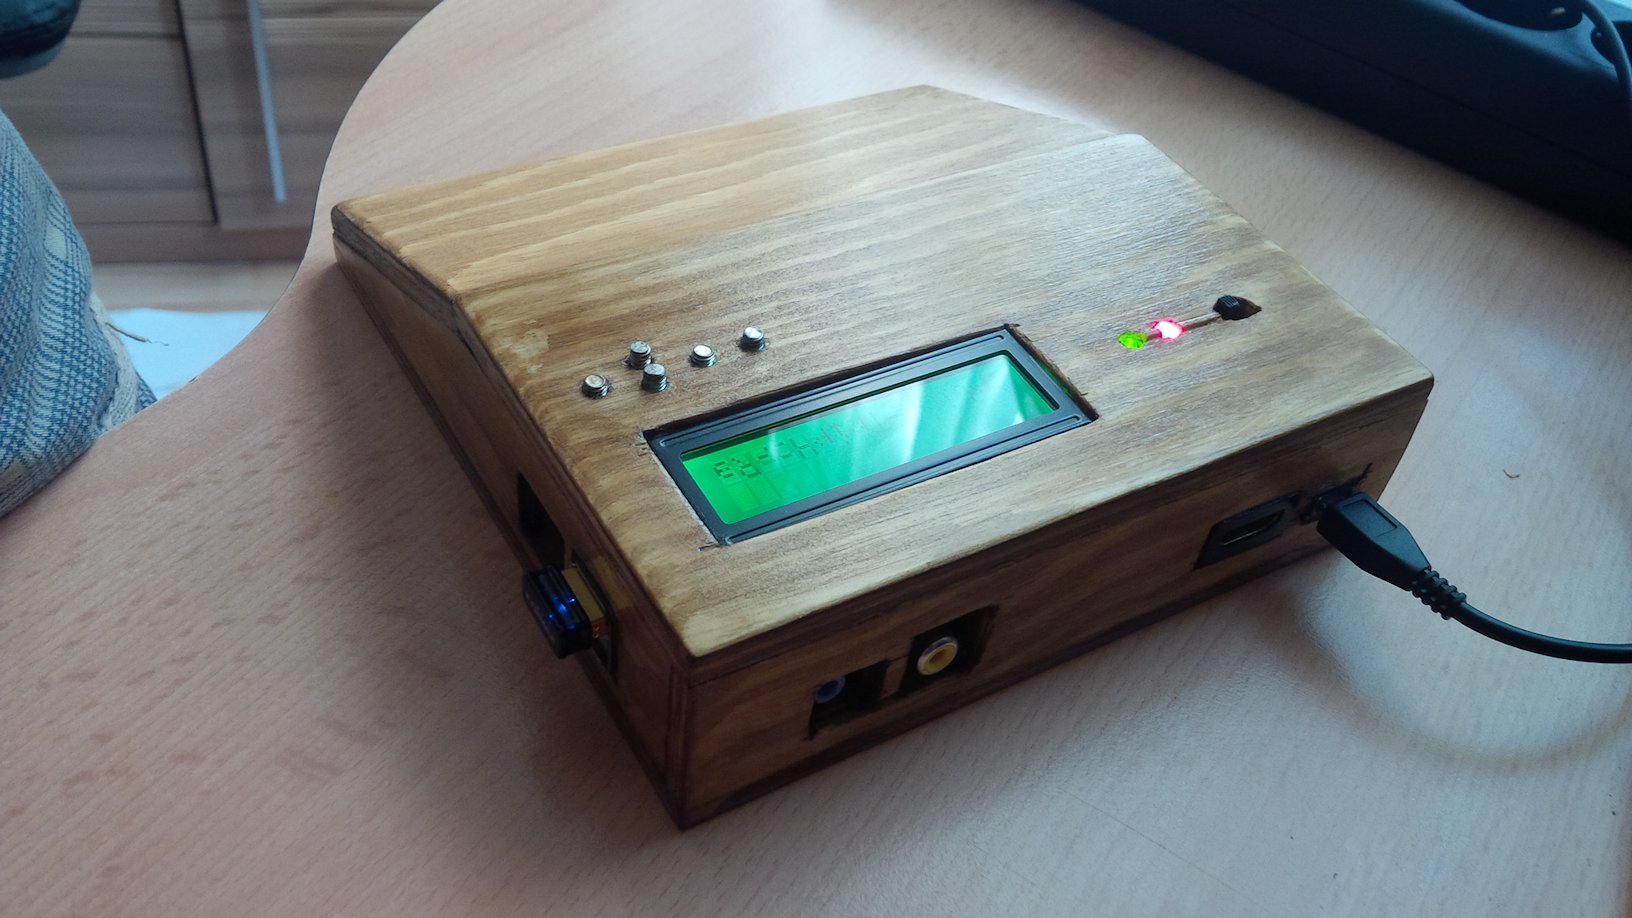
Hackaday Entry :
Posted on June 15, 2014
ASCII Dungeon Crawler
This i a prototype of a Dungeon Crawler that uses my ASCII Game Engine. I never finished it